What Electrical Panel Installation Actually Costs (And What to Expect)
Electrical panel installation is one of the bigger home projects you can take on — and one of the most important ones for your safety.
Here’s a quick breakdown so you know what you’re looking at:
| Project Type | Typical Cost Range | Power Off Time |
|---|---|---|
| Same-amp panel replacement | $1,500 – $2,800 | 4–8 hours |
| 100A to 200A upgrade | $1,800 – $3,500 | 4–8 hours |
| 200A to 400A upgrade | $4,500 – $8,000+ | 4–8 hours |
| Subpanel addition (60–100A) | $500 – $4,500 | 3–6 hours |
| ADU panel installation | $2,000 – $4,000 | Varies |
Full project timeline including permits and utility scheduling: 1–4 weeks.
Most homeowners don’t think much about their electrical panel — until something goes wrong. Lights start flickering. A breaker trips for the third time this week. Or you call an electrician about adding an EV charger and suddenly find out your panel can’t handle it.
What I usually see in Denver homes is this: the house was built decades ago, the panel was sized for that era’s electrical demands, and now it’s being asked to do a completely different job. It’s not the homeowner’s fault. It’s just that the world plugged in a lot more stuff.
The good news? A proper panel upgrade or new installation fixes all of that — and when it’s done right, it stays fixed for 25 to 40 years.
This guide walks you through everything: what panels cost, what the process looks like, when you actually need an upgrade, and how to set your home up for whatever comes next — EV chargers, solar, heat pumps, all of it.

What is an Electrical Panel and Why Does It Matter?
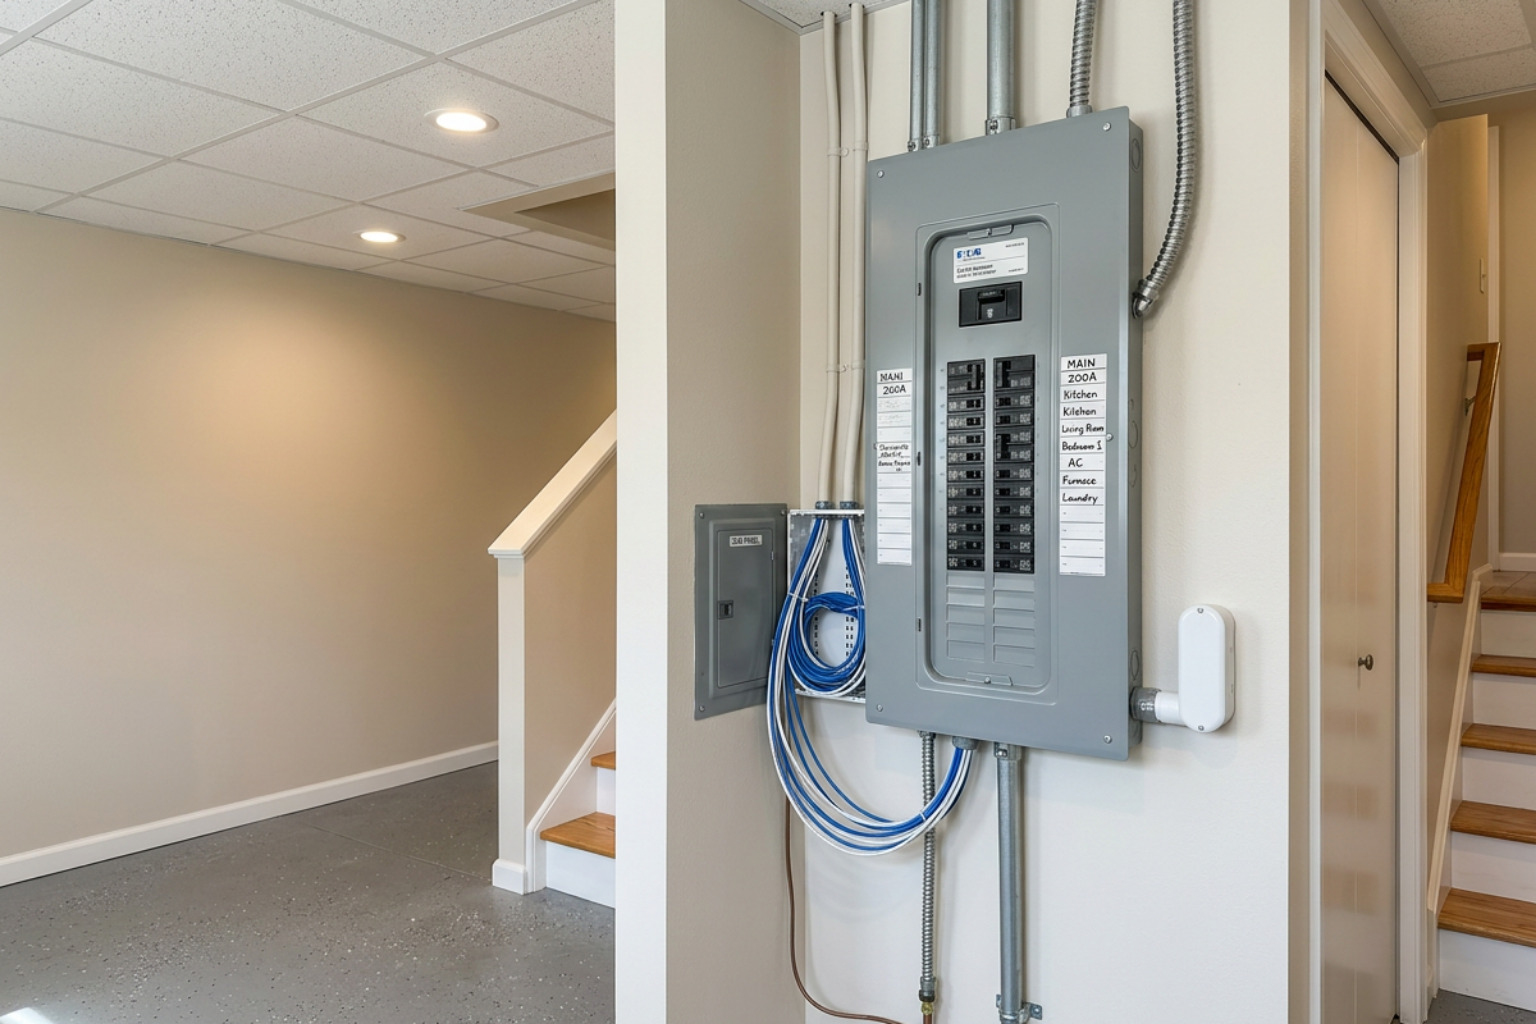
Think of your electrical panel as the beating heart of your home’s electrical system. Power from the utility company flows into this central box, where it is divided up and sent out to all your lights, outlets, and appliances.
Inside the box, you will find circuit breakers. These are safety switches designed to protect your home. If a circuit pulls more power than it can safely handle, the breaker trips and shuts off the electricity to prevent the wires from overheating.
For a detailed look at what is going on behind that metal door, check out our Inside Electric Panel Complete Guide.
Why Proper Electrical Panel Installation Matters for Your Home
When we perform an Electrical Panel Installation in the Denver Metro Area, we aren’t just putting in a new box. We are establishing a safety barrier for your family.
Proper installation prevents electrical fires by ensuring that breakers trip exactly when they are supposed to. It also ensures stable voltage throughout your home, protecting sensitive modern electronics like computers and smart TVs from damaging power fluctuations.
Finally, a code-compliant installation keeps your home in line with current national and local safety standards, which is essential if you ever decide to sell your house.
When is It Time to Upgrade Your Breaker Box?
Most electrical panels have a lifespan of 25 to 40 years. If your home in Castle Rock or Highlands Ranch was built in the 1980s or earlier, there is a good chance your panel is approaching or has already passed its prime.
As panels age, the physical connections can loosen, the metal can corrode, and the breakers themselves can become less reliable. If you are noticing persistent issues, it might be time for a change. You can read more about this in our article on Signs Outdated Electrical Panel or learn how the physical swap works in Is Your Panel Past Its Prime How to Change a Breaker Box.
Recognizing the Warning Signs of a Failing Panel
You do not have to wait for a complete power failure to know your panel is struggling. Keep an eye out for these common warning signs:
- Flickering or dimming lights when major appliances, like the air conditioner or microwave, kick on.
- Breakers that trip frequently under normal daily use.
- A warm or hot surface on the metal panel door.
- Buzzing, crackling, or clicking sounds coming from inside the panel box.
- A faint burning smell near the panel or nearby outlets.
- Rust or moisture damage on the panel enclosure.
If you are experiencing these issues, you will want to read our guide on Electrical Panel Replacement vs Repair to see which route makes the most sense for your home.
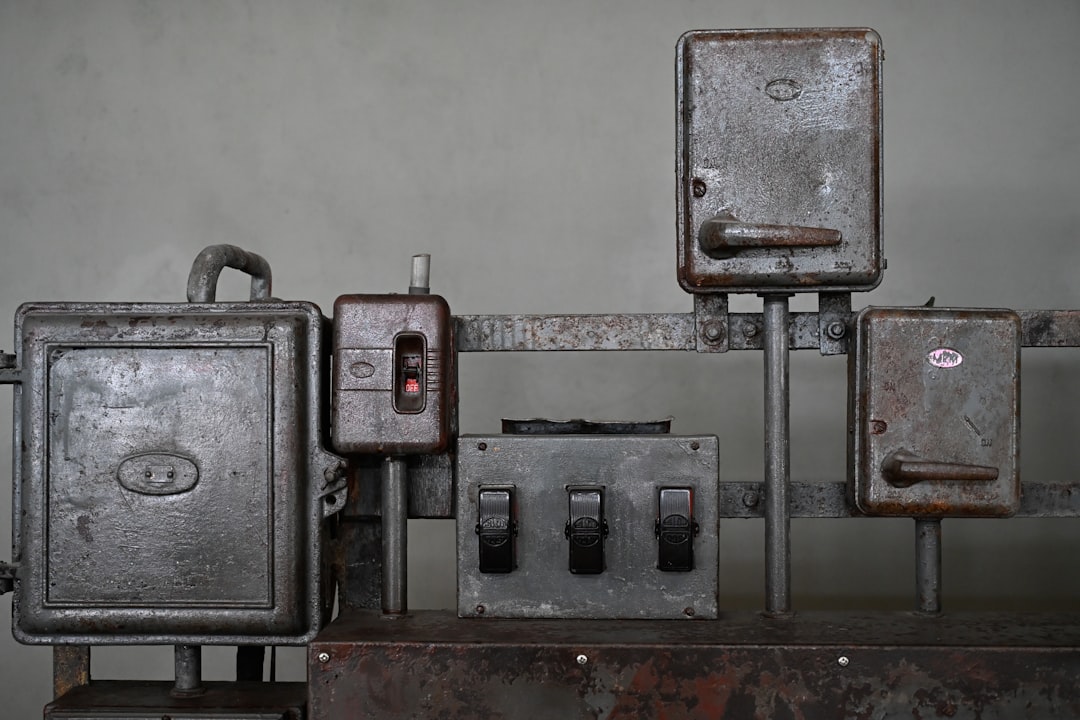
Outdated and Recalled Panels to Replace Immediately
There are a few specific brands of electrical panels that we recommend replacing immediately, regardless of whether they seem to be working. These panels have documented design flaws and high rates of failure:
- Federal Pacific Electric (FPE) Stab-Lok: These panels were installed in millions of homes from the 1950s through the 1980s. Their breakers frequently fail to trip during an overload, which has been directly linked to thousands of house fires.
- Zinsco / Sylvania: The major issue with these panels is that the breakers can weld themselves to the bus bar. This means the breaker cannot trip, allowing electrical currents to reach dangerous levels.
- Pushmatic: These panels use push-button breakers that become stiff, hard to reset, and physically degrade over time. Replacement parts are obsolete and hard to find.
If you have one of these brands in your home, many insurance companies in Colorado will refuse to write or renew your homeowner’s policy until the panel is replaced.
The Real Cost of Electrical Panel Installation in 2026
When homeowners ask about the cost of a new panel, they are often surprised by the range of prices. In 2026, the average cost to install a new electrical panel typically runs between $3,000 and $5,000 for a standard 200-amp service upgrade.
If you are simply replacing an old panel with a new one of the exact same amperage, the cost is lower because we do not have to replace the service wires coming into the home. To help you plan, we have put together a detailed breakdown in our post on Understanding Electrical Panel Upgrades When and Why You Need One.

Sizing Your Service: 100 Amps vs. 200 Amps vs. 400 Amps
The total capacity of your home’s electrical service is measured in amps. Choosing the right size is the most important step in the planning process:
- 100 Amps: This is the minimum service allowed by modern codes. It is usually sufficient for smaller, older homes that use gas for heating, cooking, and hot water. However, it does not leave much room for modern upgrades.
- 200 Amps: This is the current gold standard for new home construction and major renovations. It provides plenty of power for modern appliances, central air conditioning, and future additions like EV chargers. If you are wondering if your home is ready for this change, read From 100 to 200 Amps Is Your Home Ready for a Power Boost and explore our detailed look at Unplugging the Mystery Everything About 200 Amp Electrical Service.
- 400 Amps: This is reserved for very large homes, properties with detached workshops, multiple electric vehicles, or homes with heavy luxury loads like heated driveways and pools.
Additional Cost Factors: Rewiring, Outlets, and Trenching
While the panel itself is a major component, there are other factors that can influence the final price of your project:
- Whole-Home Rewiring: If your home was built before 1965 and still has outdated wiring (like knob-and-tube or old aluminum branch wiring), a simple panel upgrade won’t make the home completely safe. Rewiring a whole house can add $10,000 to $20,000 to the overall project.
- New Outlets and Circuits: Adding new dedicated outlets or circuits during the panel upgrade can add $230 to $875 per outlet, depending on how difficult it is to run the wire through your walls.
- Utility Trenching: If your electrical service lines run underground, upgrading your amperage might require digging a trench to lay heavier service wires. This can add significant labor costs depending on the length of the run.
Main Panels vs. Subpanels: Which Do You Need?
A main panel contains the primary shut-off switch (the main breaker) for your entire home. A subpanel is a smaller breaker box that is fed from the main panel.
Subpanels do not increase the total amount of power coming into your home; instead, they distribute a portion of the main panel’s power to a specific area. If you want to understand the difference in more detail, take a look at our article Out with the Old in with the New A Comprehensive Look at Electrical Panel Upgrades.
When to Add a Subpanel for Extra Capacity
Adding a subpanel is an excellent, cost-effective solution in several scenarios:
- Garage Workshops: If you are adding heavy-duty power tools, air compressors, or welding equipment to your garage.
- Basement Finishes: Running a single large feeder wire to a basement subpanel is much easier than running a dozen individual circuit wires back to the main panel on the other side of the house.
- Accessory Dwelling Units (ADUs): A subpanel allows a guest house or rental unit to have its own breakers nearby, so the occupant doesn’t have to enter your main home to reset a tripped breaker.
The Professional Installation Process and Safety Standards
An electrical panel installation is a highly structured process that requires precision, coordination with the local utility company (like Xcel Energy), and strict adherence to safety standards. If you want to see what a professional service upgrade involves, you can read Is It Time for a Sparking New Panel Everything About Electrical Service Upgrades.
We always recommend working with a licensed professional who is familiar with the specific codes in your area, ensuring everything complies with local Denver standards and the National Electrical Code.
Step-by-Step Electrical Panel Installation: What to Expect
On the day of your installation, here is what the process typically looks like:
- Power Isolation: We coordinate with the utility company to pull the meter or disconnect power from the overhead service mast.
- Removal: The old panel box is disconnected and carefully removed from the wall.
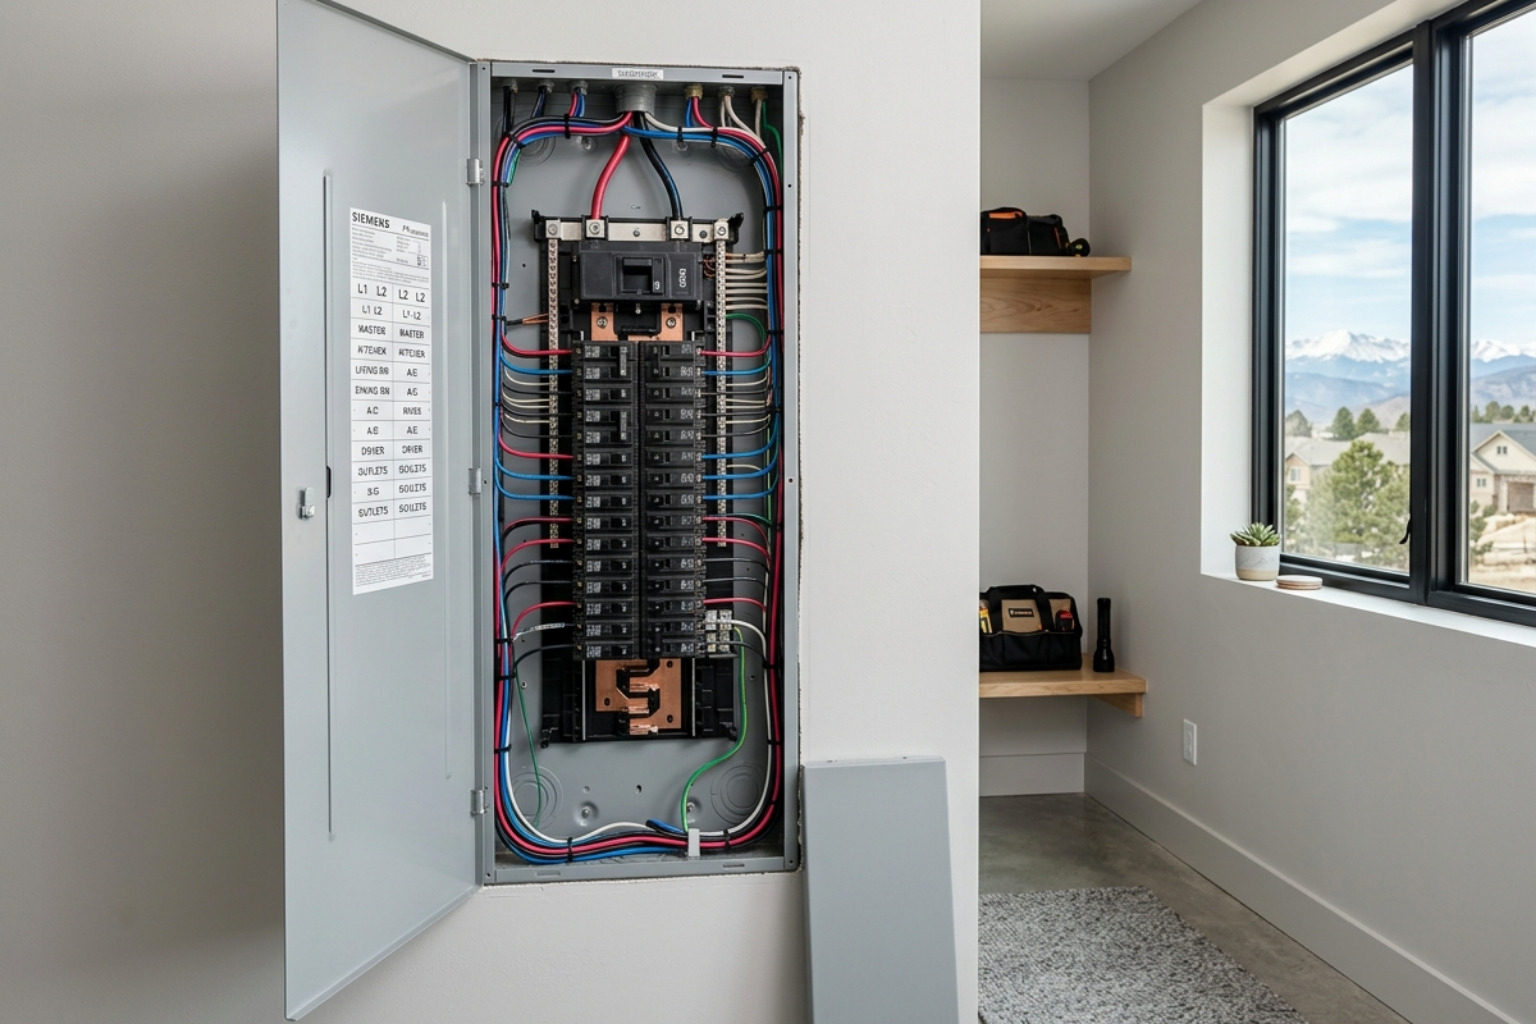
- Mounting: The new panel enclosure is mounted plumb and level.
- Service Entrance: New, heavier-gauge service wires are run from the meter socket to the main breaker.
- Grounding and Bonding: We install two grounding rods outside, spaced at least 6 to 8 feet apart, and bond the system to your home’s metal water pipes.
- Branch Circuits: Individual circuit wires are brought back into the panel, neatly routed, stripped, and connected to the new breakers.
- Labeling and Testing: Every single breaker is clearly labeled, and the entire system is tested for proper voltage and grounding.
Why DIY Panel Installation is a Major Risk
While there are plenty of home projects you can tackle on your weekend, a panel replacement is not one of them. Working inside a live electrical panel carries a severe risk of electrocution.
Furthermore, unpermitted, non-professional electrical work can void your homeowner’s insurance policy in the event of a fire. If you are tempted to try it, please read our guide on Shockingly Simple Your DIY Guide to Electrical Panel Installation to understand the technical hurdles and legal risks involved.
Safe Wiring for Hot Tubs and Backyard Spas
Adding a hot tub or backyard spa to your home in Parker or Lone Tree requires a significant amount of electrical power. These units typically pull 40 to 60 amps at 240 volts, which is a massive continuous load on your electrical system.
To handle this safely, we almost always install a dedicated outdoor subpanel with GFCI (Ground Fault Circuit Interrupter) protection within sight of the spa.
As the authorized electrical installer for Colorado Custom Spas, Harmony Electric ensures your unit is wired to exact factory specifications, protecting your investment from day one. Using an authorized installer is often required by high-end spa manufacturers to keep your warranty active and ensure the high-voltage wiring meets strict safety standards.
Future-Proofing Your Home’s Electrical System
If you are upgrading your panel in 2026, it pays to think about what your home might need five or ten years from now. Designing for future expansion today is far cheaper than paying for another upgrade down the road.
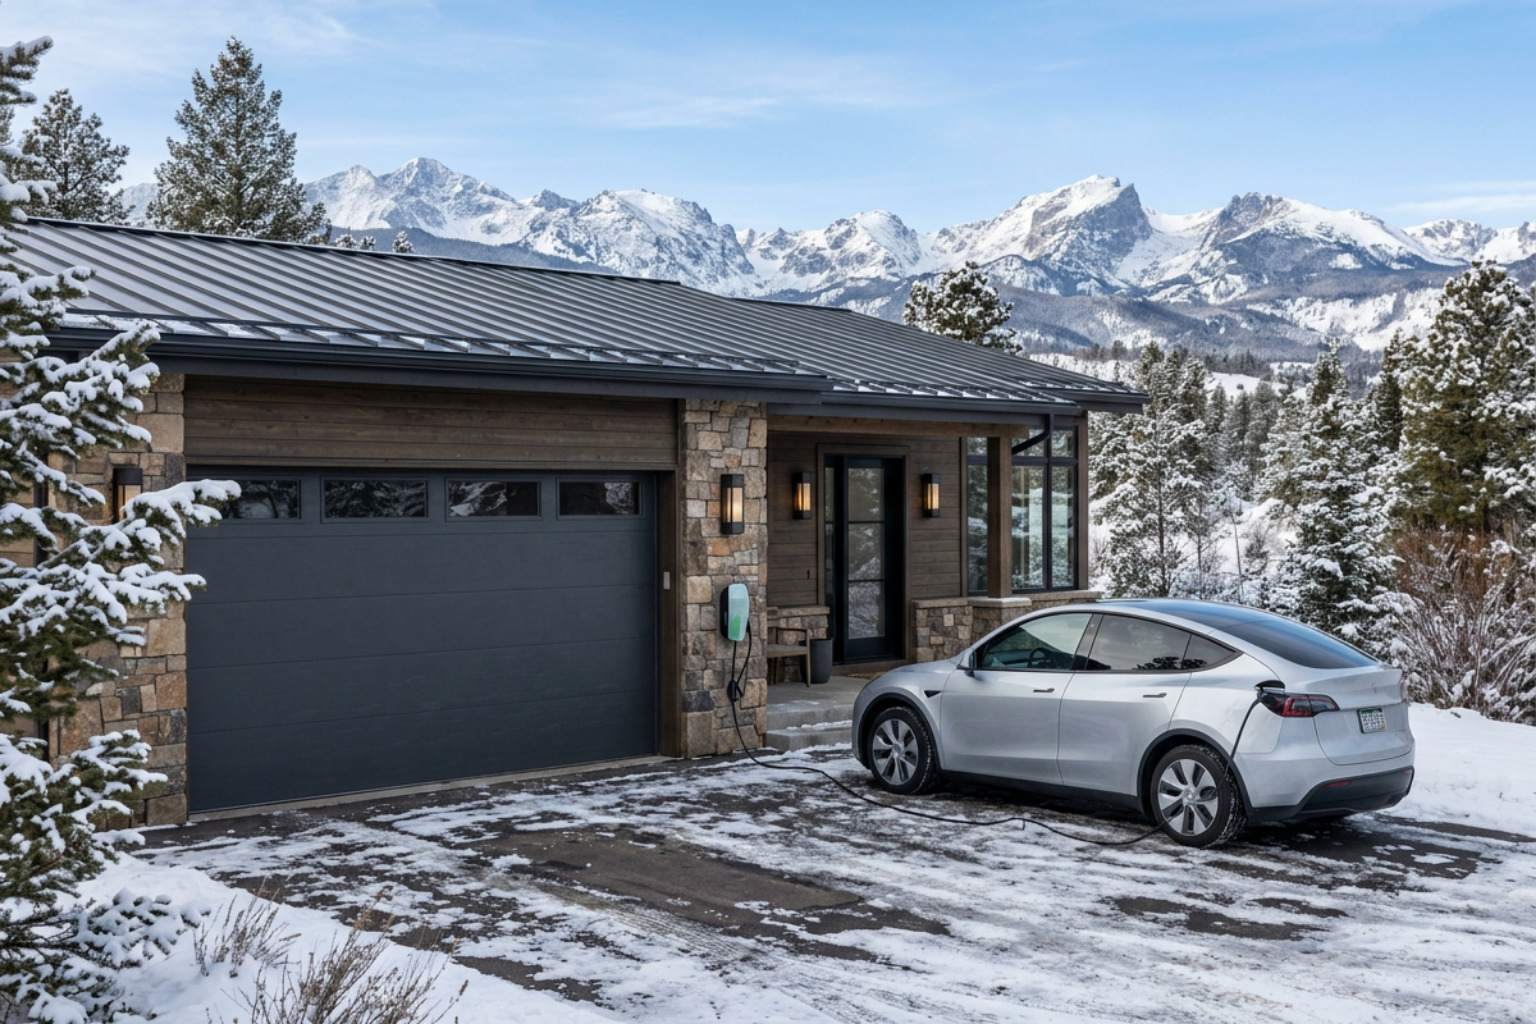
- EV Charging: Even if you do not drive an electric vehicle yet, installing a panel with enough physical space and amperage capacity for a dedicated 50-amp circuit will save you time and money when you make the switch.
- Solar Readiness: If you plan to install solar panels, ask your electrician to use a panel with a higher bus-bar rating (such as a 225A bus bar on a 200A service). This allows you to comply with the National Electrical Code’s “120% rule” for solar back-feed breakers without needing a full service change later.
- Smart Panels: Modern smart panels allow you to monitor your home’s energy usage in real-time and remotely control individual circuits from your phone, making it easier to manage battery backup systems.
Frequently Asked Questions About Panel Upgrades
How long does a typical panel installation take?
The physical swap of the panel itself usually takes between 4 and 8 hours. During this time, the power to your entire house will be turned off. However, the complete process — including pulling permits, scheduling the utility disconnect, and coordinating the final city inspection — typically takes 1 to 3 weeks of advance planning.
Do I need a permit to replace my electrical panel?
Yes. In every municipality we serve, including Denver, Castle Pines, Centennial, and Lone Tree, a building permit and subsequent safety inspection are legally required for all electrical panel installations. Skipping this step is illegal, creates safety hazards, and can cause major complications when you try to sell your home.
Will upgrading my panel increase my monthly electric bill?
No. Upgrading your panel simply increases your home’s capacity to draw power safely. It does not change the amount of electricity your appliances consume. In fact, because new panels have cleaner, tighter connections, they can sometimes slightly improve the overall efficiency of your electrical system.
Conclusion
At Harmony Electric, we believe in doing the job right the first time. Led by Randy Harmuth, Master Electrician, we bring decades of real-world experience, clear communication, and straightforward recommendations to every home we visit in Denver and the surrounding communities.
Whether you are upgrading your service to support a new electric vehicle, setting up a backyard spa, or simply replacing an old, unsafe breaker box, we are here to help. For more information about how we can make your home’s power system safe, reliable, and ready for the future, visit our page on residential services.