Why a 240V EV Charger Installation Guide Matters for Denver Homeowners
An EV charger installation guide helps you understand what’s involved in getting a Level 2 charger set up safely at home. Here’s the quick version:
Basic Installation Steps:
- Choose the right charger – Match amperage to your car and panel capacity (typically 32A or 48A)
- Check your electrical panel – Ensure you have space and capacity for a new 240V dedicated circuit
- Get permits – Required in most Denver metro municipalities
- Hire a licensed electrician – Install the circuit, mount the charger, and wire it correctly
- Final inspection – Verify everything meets NEC Article 625 safety codes
- Start charging – Typically adds 25-40 miles of range per hour
Typical costs: $800-$2,000 total, including charger, labor, and permits (less if you qualify for rebates)
I’ve installed dozens of EV chargers around Denver, and most homeowners tell me the same thing: they wish they’d done it sooner.
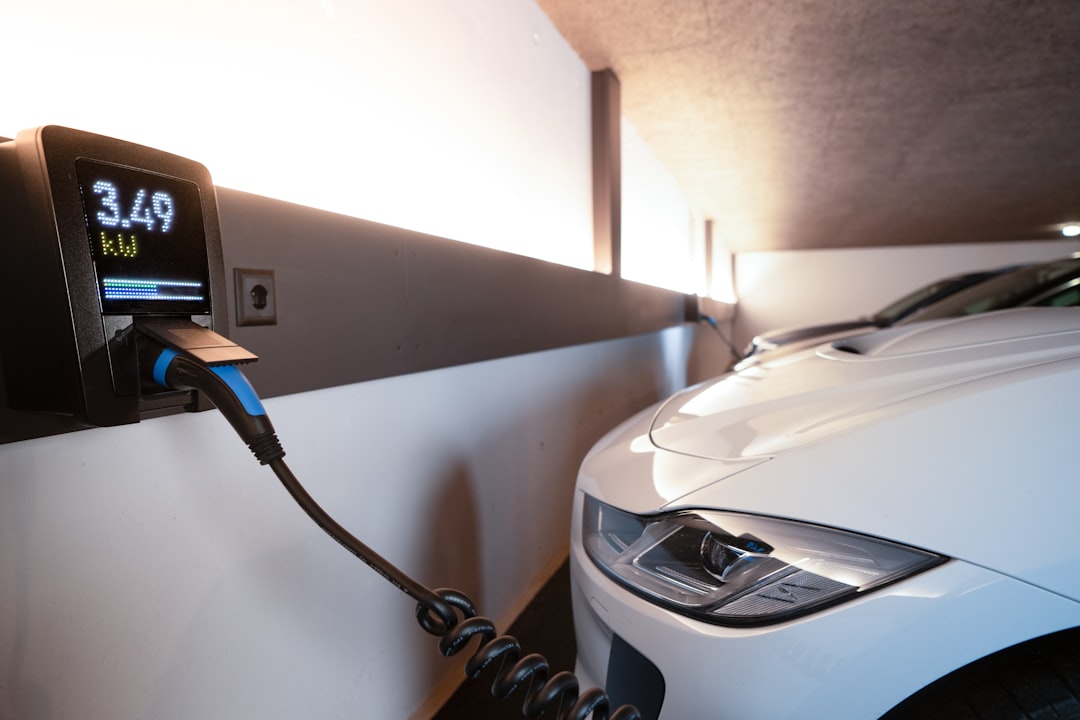
There’s something genuinely convenient about plugging in when you get home and waking up to a full “tank” every morning. No more planning trips around charging stops or waiting at public stations.
Over 80% of EV charging happens at home, and it’s easy to see why. But here’s the thing most people don’t realize until they try it: that standard 120V outlet in your garage isn’t going to cut it for daily driving.
Level 1 charging might add 4-5 miles of range per hour. If you drive 40 miles a day, you’re looking at an 8-10 hour charge just to break even. Miss a night, and you’re behind.
A 240V Level 2 charger changes everything. Same overnight charge gets you 200+ miles of range, even if you come home nearly empty.
The installation itself isn’t complicated, but it does require real electrical work—a new dedicated circuit, proper wire sizing, code-compliant mounting, and usually a permit. That’s not a weekend DIY project, and honestly, it shouldn’t be.
In this guide, I’ll walk you through exactly what’s involved, what it costs, and how to make sure it’s done safely and correctly the first time.
 adds 4-5 miles per hour and takes 24+ hours for full charge; Level 2 (240V dedicated circuit) adds 25-40 miles per hour and takes 6-8 hours for full charge, with visual icons showing outlet types and charging times - EV charger installation guide infographic")
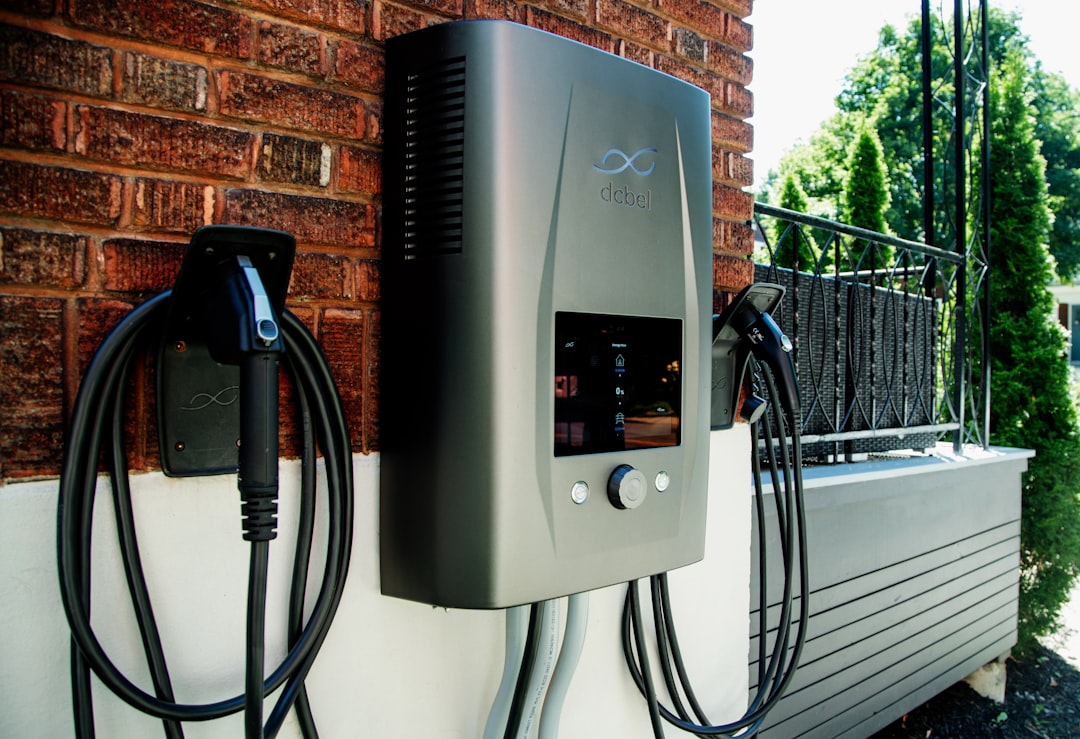
Step 1: Choosing the Right Charger for Your Home and Car
When we talk about home EV charging, we’re almost always talking about Level 2 chargers. These bad boys use a 240-volt circuit, similar to what your electric dryer or oven uses. The biggest benefit? Speed. While a Level 1 charger (your standard 120V wall outlet) might add 3-5 miles of range per hour, a Level 2 charger can add 25-60 miles of range per hour. This means you can fully charge most EVs in 3 to 6 hours.
Choosing the right Level 2 charger involves a few considerations:
- Amperage and Charging Speed: Chargers come in different amperages, like 32A, 40A, or 48A. Higher amperage means faster charging, but your car’s onboard charger has a limit, and so does your home’s electrical panel.
- Matching Charger to Your Car’s Capability: It doesn’t make sense to get a 48A charger if your car can only accept 32A. We’ll help you figure out the sweet spot for your vehicle.
- Hardwired vs. Plug-in Installations: This is a big one, and we’ll dive deeper into it shortly.
- Smart Charger Benefits: Many modern chargers are “smart.” This means they connect to your home Wi-Fi and often come with an app. These apps let you monitor charging, set schedules to take advantage of off-peak electricity rates (saving you money!), and even track energy usage. Some can even perform dynamic load balancing, temporarily reducing charging speed if your home’s electrical demand spikes (like when the AC and oven are on) to prevent tripped breakers.
- Cable Length Considerations: Think about where you park your car and where the charger will be mounted. You’ll want a cable long enough to comfortably reach your EV’s charging port with some slack, but not so long it becomes a tripping hazard. Most cables are between 18 and 25 feet long.
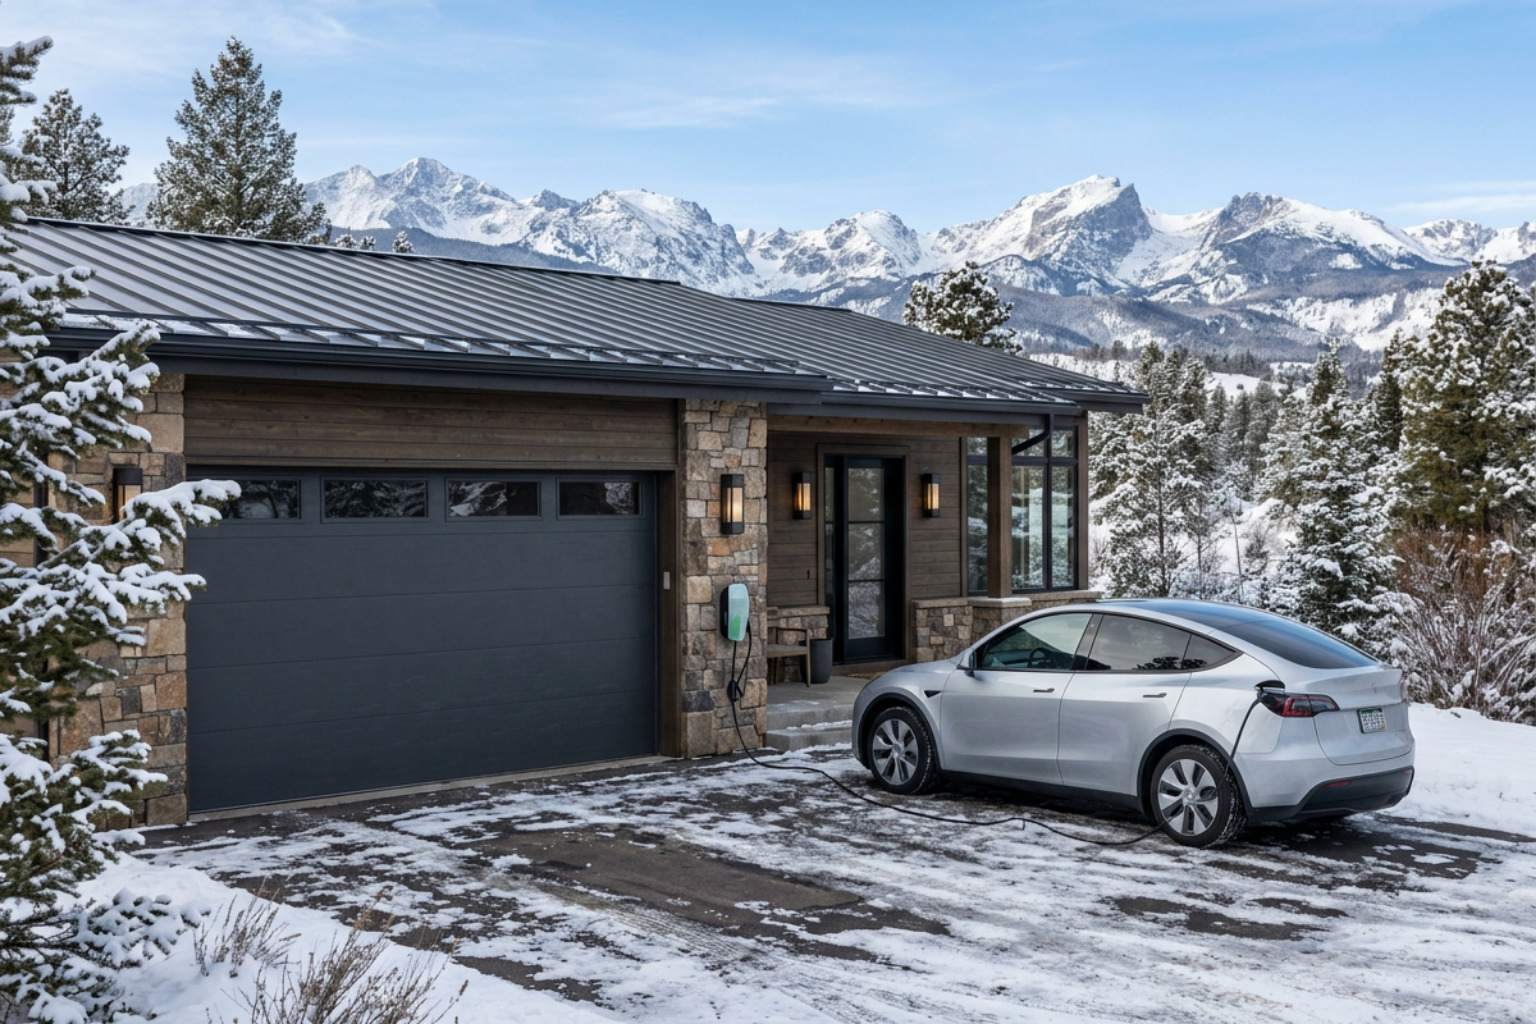
- Indoor vs. Outdoor Rated Units: If your charger will be outside, it needs to be built to withstand Colorado’s weather—sun, snow, and everything in between. These units have specific NEMA ratings for weather protection.
We offer a range of solutions and can help you understand the options. You can find more information about our EV Charger Installation Pricing.
How to Pick the Right Amperage
This is where things can get a little technical, but it’s important. Common Level 2 chargers are often 32A or 48A.
- 32A vs. 48A Chargers: A 32A charger requires a 40A dedicated circuit, providing roughly 7.7 kW of power. A 48A charger needs a 60A dedicated circuit, delivering around 11.5 kW. The higher the amperage, the faster your car charges.
- Your Car’s Onboard Charger Limit: Your EV has an “onboard charger” that dictates how much power it can actually accept. If your car’s onboard charger maxes out at 32A, installing a 48A charger won’t make it charge any faster. It’s like trying to fill a small bucket with a firehose—the bucket can only hold so much.
- Electrical Panel Capacity: The biggest hurdle is often your home’s electrical panel. Adding a 40A or 60A circuit is a significant load. We’ll need to do a “load calculation” to ensure your existing panel can handle it without being overloaded.
- Future-proofing Your Installation: Even if your current EV only accepts 32A, you might consider installing a 48A-capable circuit if your panel allows. This way, if you upgrade your EV in the future to one that can take more power, you won’t need another electrical upgrade.
For a deeper dive into the different charging levels and what they mean for your home, check out our EV Charger Levels Guide.
Hardwired vs. Plug-In: What I Recommend for Denver Homes

This is a question we get asked a lot. Should you hardwire your EV charger or plug it into a NEMA 14-50 outlet?
- Plug-in Convenience: A plug-in charger connects to a 240V NEMA 14-50 outlet, similar to an RV outlet. It offers a bit more flexibility if you ever wanted to move the charger.
- The Hidden Risk of Melting Outlets: Here’s where my experience as an electrician comes in. While many chargers come with a NEMA 14-50 plug, these consumer-grade outlets are not designed for the sustained, high-power draw of EV charging, day after day. We’ve seen cases, and you can find many forum discussions, where NEMA 14-50 outlets have melted during EV charging. This is a serious fire hazard. Just search for “melted NEMA 14-50 outlet” on sites like Reddit or Tesla Motors Club, and you’ll see why we’re cautious. For instance, this forum discussion on melted outlets highlights the issue.
- Why Hardwiring is Safer: Hardwiring means the charger is directly connected to your home’s electrical system, with no intermediary outlet. This creates a much more robust and safer connection, designed for continuous high-amperage use.
- Achieving Higher Amperage with Hardwiring: Many 48A chargers are designed to be hardwired. This allows them to safely deliver their full power without the limitations or risks associated with a plug-in connection.
- A Cleaner, More Permanent Look: Hardwired installations often look cleaner and more integrated into your home. It’s a permanent solution that matches the permanence of owning an EV.
For these reasons, we almost always recommend a hardwired installation for residential EV chargers in Denver. It’s simply the safest and most reliable long-term solution.
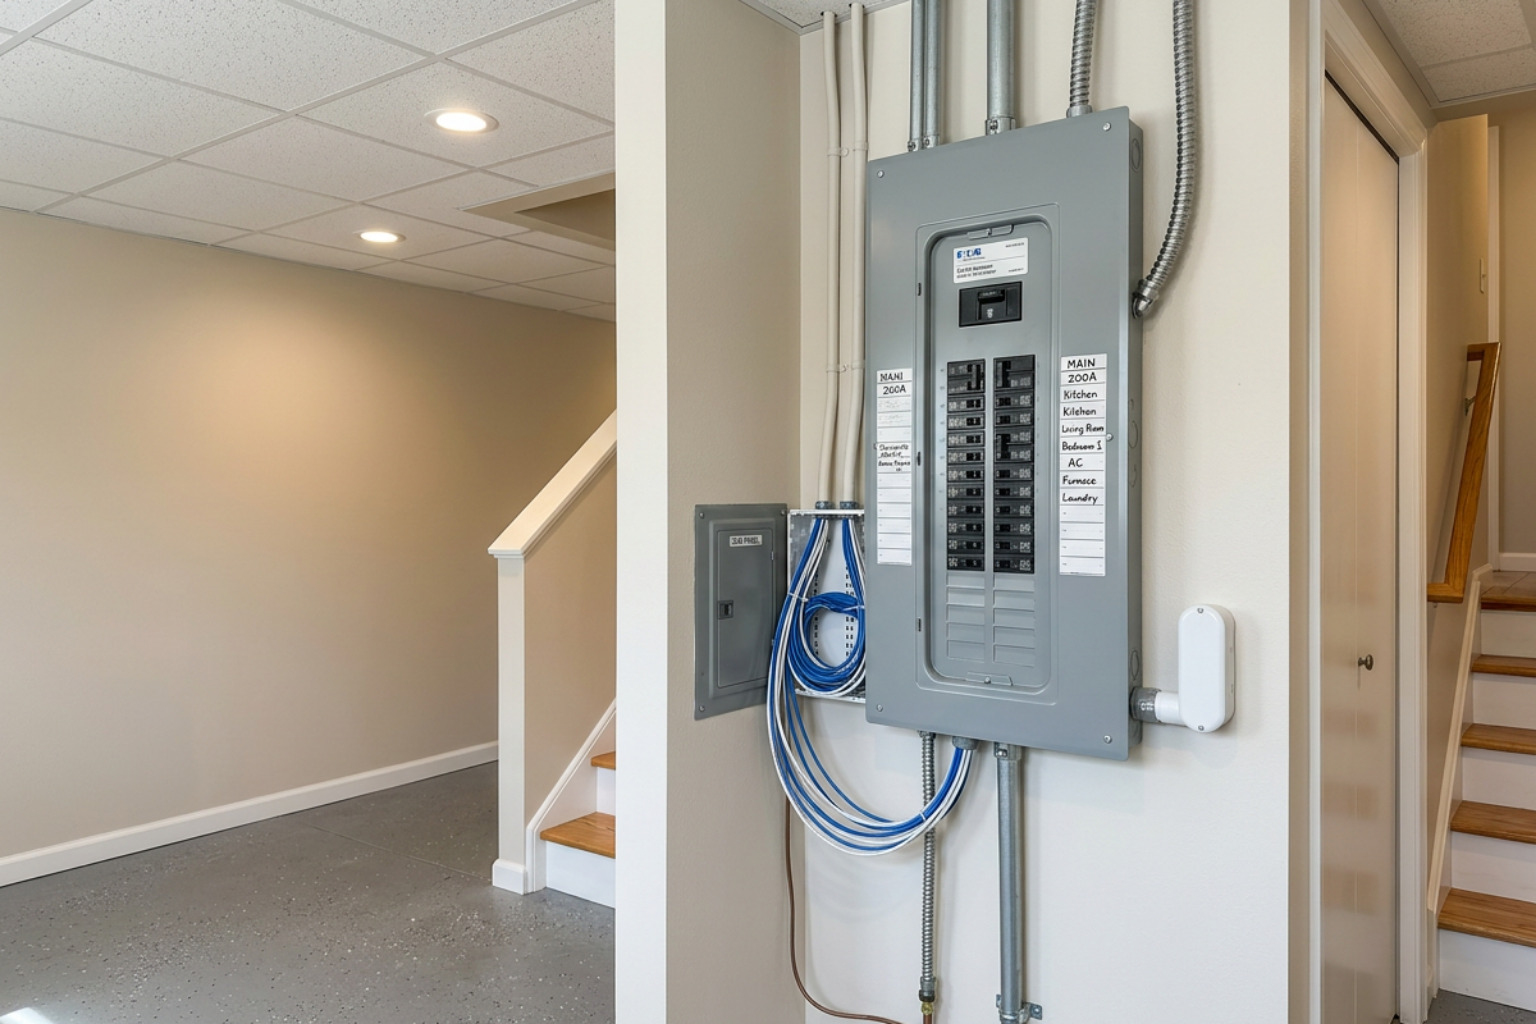
Step 2: The Electrical Check-Up: Can Your Home Handle It?
Before we even think about mounting a charger, the most critical step is to assess your home’s electrical system. This isn’t just about plugging something in; it’s about adding a significant, continuous load to your entire house.

- 240-Volt Dedicated Circuit: A Level 2 EV charger requires its own dedicated 240-volt circuit. What does “dedicated” really mean? It means this circuit is exclusively for your EV charger, ensuring it gets a consistent power supply without sharing with other appliances, which could cause overloads or tripped breakers.
- Load Calculation Explained Simply: Think of your home’s electrical panel as a highway. There’s a certain amount of traffic (electricity) it can handle at any given time. A load calculation is how we figure out how much “traffic” your home currently uses when everything is running (AC, oven, dryer, lights, etc.) and if there’s enough “road space” left for your EV charger.
- How to Check Your Electrical Panel’s Capacity: We’ll look at the main breaker size (e.g., 100-amp or 200-amp) and the available space for new breakers.
- Signs You Might Need a Panel Upgrade: If your lights flicker when large appliances turn on, if you frequently trip breakers, or if your panel is full with no room for a new circuit, these are all signs that your electrical system might be stretched thin. Many older Denver-area homes, especially those built before the 1980s, might only have 100-amp service, which can be tight for an EV charger.
- Why This Step Requires a Licensed Electrician: This isn’t guesswork. A proper load calculation and assessment of your electrical panel require the expertise of a licensed electrician. We’re looking at the safety of your entire home. If you’re curious about when a larger electrical overhaul might be needed, you can learn about our Home Rewiring in Colorado services.
Do You Need an Electrical Panel Upgrade?
In a lot of older houses around Denver, Castle Rock, or Highlands Ranch, the existing electrical panel might be at its limit.
- Signs of an Overloaded Panel: Besides the flickering lights and tripped breakers, an older panel might simply not have the physical space to add a new 40A or 60A circuit for your EV charger.
- Common in Older Denver-Area Homes: Many homes in our service areas, from Centennial to Parker, were built when electrical demand was much lower. Adding an EV charger, plus modern appliances, can push these older systems past their safe limits.
- 100-Amp vs. 200-Amp Service: Most newer homes have 200-amp service, which generally has enough capacity. Older homes often have 100-amp service. While it’s sometimes possible to squeeze a charger onto a 100-amp panel, it often requires careful load management or, more commonly, a panel upgrade to 200 amps.
- Adding Up Your Home’s Electrical Loads: We’ll assess all your major appliances—AC, furnace, electric water heater, oven, dryer, hot tub (if you have one!)—to see if there’s enough headroom for the EV charger. If not, a panel upgrade might be necessary. This is a significant investment, but it’s often a smart one for the safety and future value of your home.
We handle all sorts of electrical system improvements. You can learn more about our Electrical Repairs and Upgrades.
The Complete EV Charger Installation Guide: What to Expect
Once we’ve determined your home’s electrical system is ready (or made it ready with an upgrade), the actual EV charger installation guide process is fairly straightforward for us.
- The Professional Installation Process: Our goal is always a clean, safe, and code-compliant installation. We treat your home with respect, ensuring minimal disruption and a tidy workspace.
- Safety First: As a Master Electrician, safety is my absolute top priority. This involves turning off power, using insulated tools, and strictly following all electrical codes.
- Typical Installation Time: For a straightforward Level 2 home charger installation by an experienced technician, it typically takes about 2-3 hours, provided no additional electrical work (like a panel upgrade) is needed. Factors like the distance from the electrical panel, the complexity of the wiring path, or the need for drywall repair can extend this time.
- Permitting in the Denver Metro Area: This is crucial. In Denver, Castle Rock, Centennial, and most surrounding municipalities, an electrical permit is always required for EV charger installations. This ensures that the work is inspected and meets local safety standards. We handle the permitting process for you.
- Typical Installation Steps from Start to Finish:
- Site Assessment: A final check of the chosen location, electrical panel, and wiring path.
- Mounting the Charger: Securely attaching the charging unit to a wall (usually in the garage or on an exterior wall).
- Running Conduit for Wiring Protection: Installing a protective pathway for the new 240V wiring from your electrical panel to the charger. This can be surface-mounted or run through walls, depending on your home and preference.
- Wiring the New Dedicated Circuit: Pulling the correctly sized wires and installing a new circuit breaker in your electrical panel.
- Connecting the Charger Unit: Making the final electrical connections to the charger itself.
- Final Testing and Inspection: Powering up the circuit, testing the charger’s functionality, and ensuring all connections are secure and safe.
- Job Site Clean-up: Leaving your home as clean, or cleaner, than we found it.
Key Safety Codes We Follow (NEC)
Electrical work, especially for something that draws as much power as an EV charger, must adhere to strict safety codes. In the US, this is primarily the National Electrical Code (NEC).
- NEC Article 625: This specific article of the NEC covers Electric Vehicle Charging Systems. It outlines all the requirements for safe installation. We’re well-versed in these rules. We recommend reviewing the full National Electrical Code if you are unfamiliar with it.
- Proper Mounting Height Requirements: The NEC mandates that chargers be mounted at least 18 inches (450 mm) off the ground for indoor installations and 24 inches (600 mm) for outdoor setups. This helps prevent damage and makes the unit more accessible.
- ADA Guidelines for Accessibility: For any public or workplace charging, or even just good practice at home, we consider ADA guidelines. The maximum reach height for any EV charger should not exceed 48 inches from the ground to the charging port, ensuring it’s usable for everyone.
- Built-in GFCI Protection: Most modern Level 2 chargers have built-in Ground Fault Circuit Interrupter (GFCI) protection. This is a critical safety feature that detects electrical faults and quickly shuts off power to prevent electric shock. If your charger has this, we typically don’t install an additional GFCI breaker in the panel, as it can cause “nuisance tripping.”
- Outdoor-Rated Enclosures (NEMA 4): For outdoor chargers or installations in wet locations, the NEC requires the use of a waterproof enclosure. We recommend NEMA 4 rated or better to withstand Colorado’s elements.
- Safe Cable Management: Charging cables longer than 25 feet require a dedicated cable management system. This isn’t just about neatness; it prevents damage to the cable and minimizes tripping hazards.
A Homeowner’s EV charger installation guide to the Process
Let’s break down the actual steps we take when performing an EV charger installation for your Denver home:
- Site Assessment: We start by confirming the best location for your charger, considering proximity to your parking spot, your electrical panel, and any obstacles. We’ll verify wall stud locations for secure mounting.
- Mounting the Charger Securely: Using appropriate fasteners, we’ll mount the charger unit to the wall. This needs to be robust, as the unit and cable can be heavy.
- Running Conduit for Wiring Protection: We install conduit—a protective tubing—from your electrical panel to the charger location. This protects the electrical wires from physical damage and ensures a clean, professional look.
- Wiring the New Dedicated Circuit: We run the appropriate gauge wire through the conduit, connect it to the charger, and install a new, dedicated circuit breaker in your electrical panel. All connections are torqued to specifications for safety.
- Connecting the Charger Unit: We make the final connections inside the charger, ensuring everything is wired correctly according to the manufacturer’s instructions and NEC standards.
- Final Testing and Inspection: Once installed, we power up the system, test the charger to ensure it communicates with your vehicle (if available), and verify all safety features are functioning. We’ll also walk you through how to use your new charger.
- Job Site Clean-up: We pride ourselves on leaving your home tidy. All debris, wire scraps, and packaging will be removed from your property.
Understanding Installation Costs and Available Incentives
One of the first questions homeowners ask is, “How much does it cost?” The price of an EV charger installation can vary, but we believe in clear, upfront pricing.
- Installation Cost Factors:
- Charger Unit Price: Home EV chargers typically range from $800 to $1500. This doesn’t include installation.
- Labor Costs: This covers the electrician’s time for the assessment, installation, and testing. A straightforward Level 2 installation by an experienced technician typically takes about 2-3 hours.
- Permit Fees: These vary by municipality in the Denver metro area, but we include them in our quotes.
- Cost of Potential Panel Upgrades: If your electrical panel needs an upgrade (from 100-amp to 200-amp, for example), this is a separate, larger cost. Residential EV charger installations can range from $100 to $2,000, with costs increasing if substantial electrical upgrades are required.
- Federal Tax Credits Explained: The good news is that there are often incentives! In the US, federal tax credits can cover 30% of residential EV charger installation costs, up to $1,000. You can explore these and other local incentives with a tool like the US Rebate Finder.
- Colorado and Local Utility Rebates (Xcel Energy): Colorado residents, particularly Xcel Energy customers, should check for local rebates. These can vary, so it’s always worth checking with your utility provider. We also serve homeowners in many communities, including Centennial, where specific local programs might apply.
Frequently Asked Questions about Home EV Charger Installation
Can I install an EV charger myself?
This is a common question, and as a Master Electrician, my answer is a firm “no” for Level 2 chargers.
- Risks of DIY Electrical Work: Installing a 240-volt circuit involves high voltage and significant amperage. Mistakes can lead to serious injury, electrocution, or even house fires.
- Code Compliance Issues: Electrical work must meet strict local and National Electrical Code (NEC) standards. Without proper training and permits, DIY installations almost always fall short, which can cause problems during home inspections or with insurance.
- Safety Hazards and Fire Risk: Improper wiring can overheat, leading to melted wires and fire. We’ve seen consumer-grade outlets melt under sustained EV charging loads, even when installed correctly.
- Voiding Charger and Vehicle Warranties: Many EV charger manufacturers and even vehicle manufacturers require professional installation for their warranties to remain valid.
- Why a Licensed Electrician is Essential for 240V Work: A licensed electrician knows the codes, understands load calculations, and has the right tools and training to do the job safely and correctly. This is one area where cutting corners isn’t worth the risk. For example, our expert electrician services in Parker ensure all installations meet the highest safety standards.
How long does a typical installation take?
- Straightforward Installs (2-3 hours): As mentioned, if your electrical panel has the capacity and space, and the wiring path is simple (e.g., directly into an adjacent garage), we can usually complete the installation in 2 to 3 hours.
- Factors That Can Add Time:
- Complex Wiring Paths: If the charger is far from the panel, or requires running conduit through finished walls or ceilings, it will take longer.
- Drywall Repair: If we need to open up walls to run wiring, there will be additional time for repair work (though we try to minimize this).
- Panel Upgrades: If your electrical panel needs an upgrade, that’s a separate project that will add significant time and cost.
- What to Expect on Installation Day: We’ll confirm the plan with you, get to work, and keep you updated. We typically need to shut off power to your home for a portion of the installation, but we’ll coordinate that with you.
What if my charger stops working?
It’s rare for a professionally installed charger to completely stop working, but sometimes things happen. Here are some basic troubleshooting steps you can try, and when to give us a call:
- Checking the Circuit Breaker: Go to your electrical panel and check the breaker dedicated to your EV charger. If it’s tripped (usually halfway between ON and OFF), switch it completely OFF and then back ON.
- Inspecting the Cable and Connector: Look for any visible damage to the charging cable or the connector that plugs into your car. Make sure the connector is fully seated in your car’s charging port.
- Rebooting the Charger: Many smart chargers have a reset button, or you can temporarily turn off the circuit breaker for a minute or two and then turn it back on.
- When to Call an Electrician for Help: If these steps don’t resolve the issue, or if you see error lights on your charger that don’t clear, it’s time to call us. We can diagnose the problem, which might be anything from a faulty unit to an electrical issue we need to address. It’s better to be safe than sorry with electrical systems. For more helpful advice, you can always check out our Electrical Tips & Insights blog.
Ready to Power Up? Let’s Get It Done Right.
Installing a Level 2 EV charger at home is one of the best investments you can make as an EV owner. It offers best convenience, saves you time and money, and adds value to your property.
Here at Harmony Electric, we understand that you want a reliable charging solution that simply works, day in and day out. We bring our expertise as Master Electricians to every EV charger installation guide project in Denver and the surrounding communities, ensuring it’s done safely, efficiently, and to the highest standards.
We stand by our work with a lifetime workmanship guarantee, giving you peace of mind. Our commitment to quality means no shortcuts, just honest recommendations and precise electrical work.
If you’re ready to enjoy the full benefits of EV ownership without the hassle, let’s talk. We’ll provide a clear, upfront quote and make sure your EV charging solution is exactly what you need.
Get a clear, upfront quote for your EV Charger Installation