Why Your Electrical Panel Is More Important Than You Think
I’m Randy Harmuth, Master Electrician and owner of Harmony Electric here in Denver. If you’re thinking about trying to install electric panel systems yourself, I want to be straight with you—it’s one of the most complex and dangerous electrical jobs a homeowner can attempt.
It’s not like changing a light fixture. You’re working with the main power supply to your entire home, and a single mistake can cause a fire or serious injury. That’s why this job requires a permit, coordination with the utility company to shut off power, and a final inspection in nearly every city.
That said, I believe homeowners should understand how their electrical systems work. Whether you plan to hire a pro or are just curious, knowing what’s involved helps you make better, safer decisions.
Most older Denver homes have panels rated for 100-150 amps, which often isn’t enough for modern needs like an EV charger or a hot tub. Panels typically last 20-25 years, but some brands like Federal Pacific or Zinsco have known safety issues and should be replaced immediately.
The average cost for a professional panel replacement in the Denver area is between $1,500 and $4,000. This guide will walk you through the entire process, from planning to the final inspection, and I’ll be honest about when it’s time to call a professional.

Install electric panel terms to remember:
- changing a fuse box to a breaker box
- changing breaker in panel
First Things First: What Your Electrical Panel Actually Does
Let’s start with the basics—what your panel is, why it matters, and how to know if it’s time for a change.
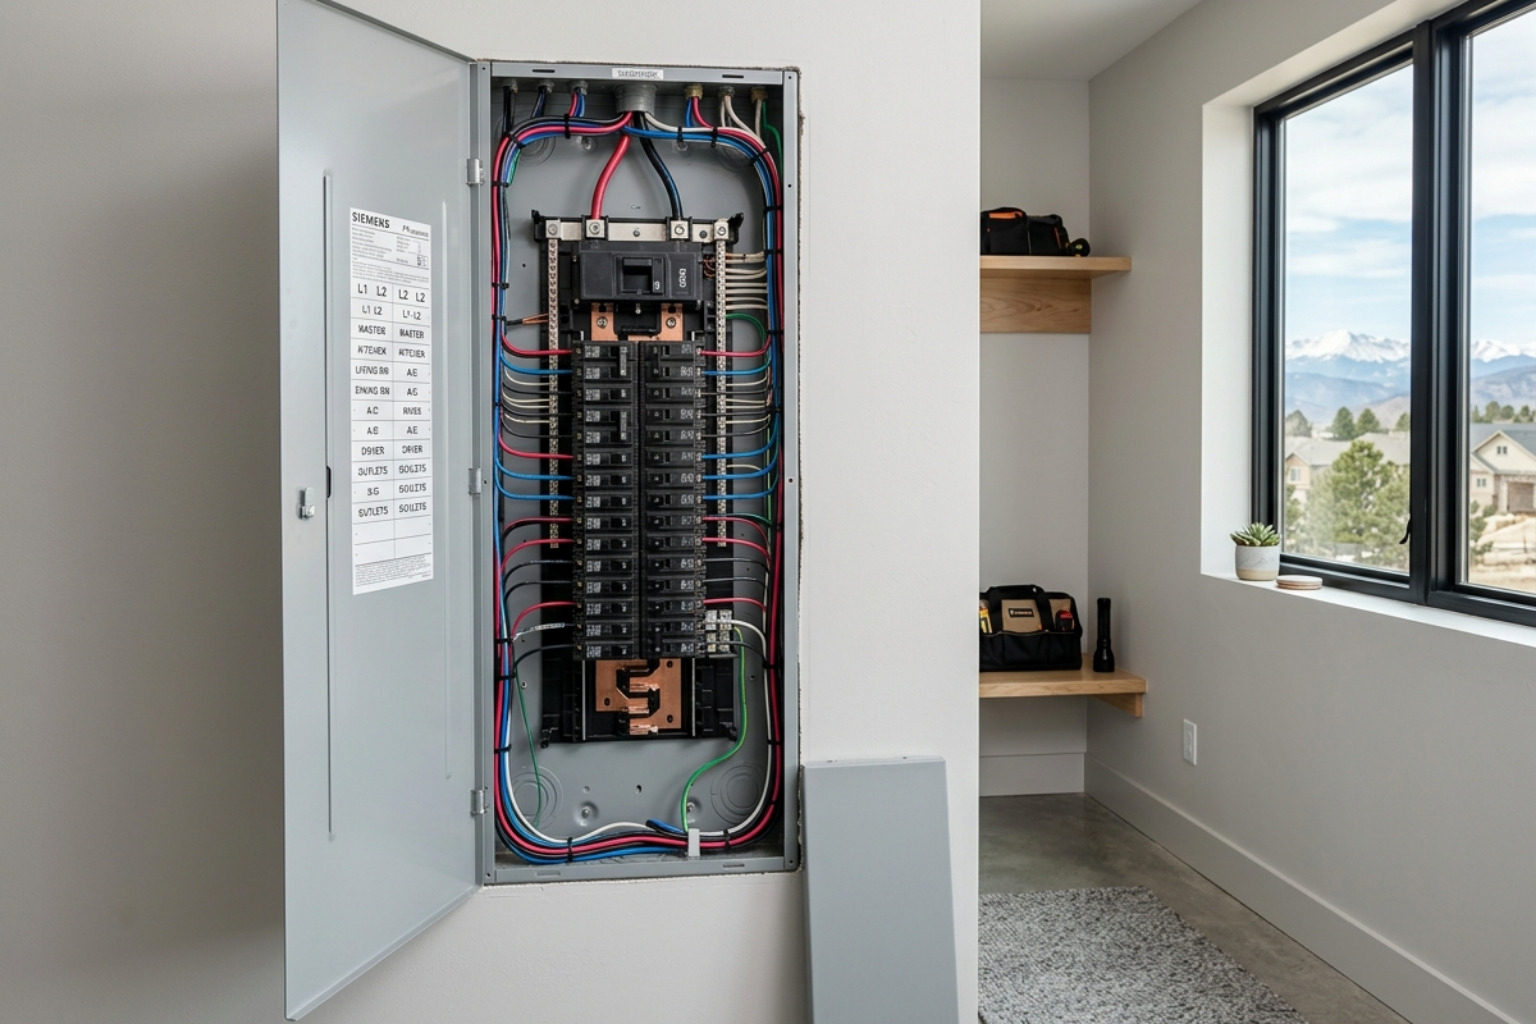
What Is an Electrical Panel?
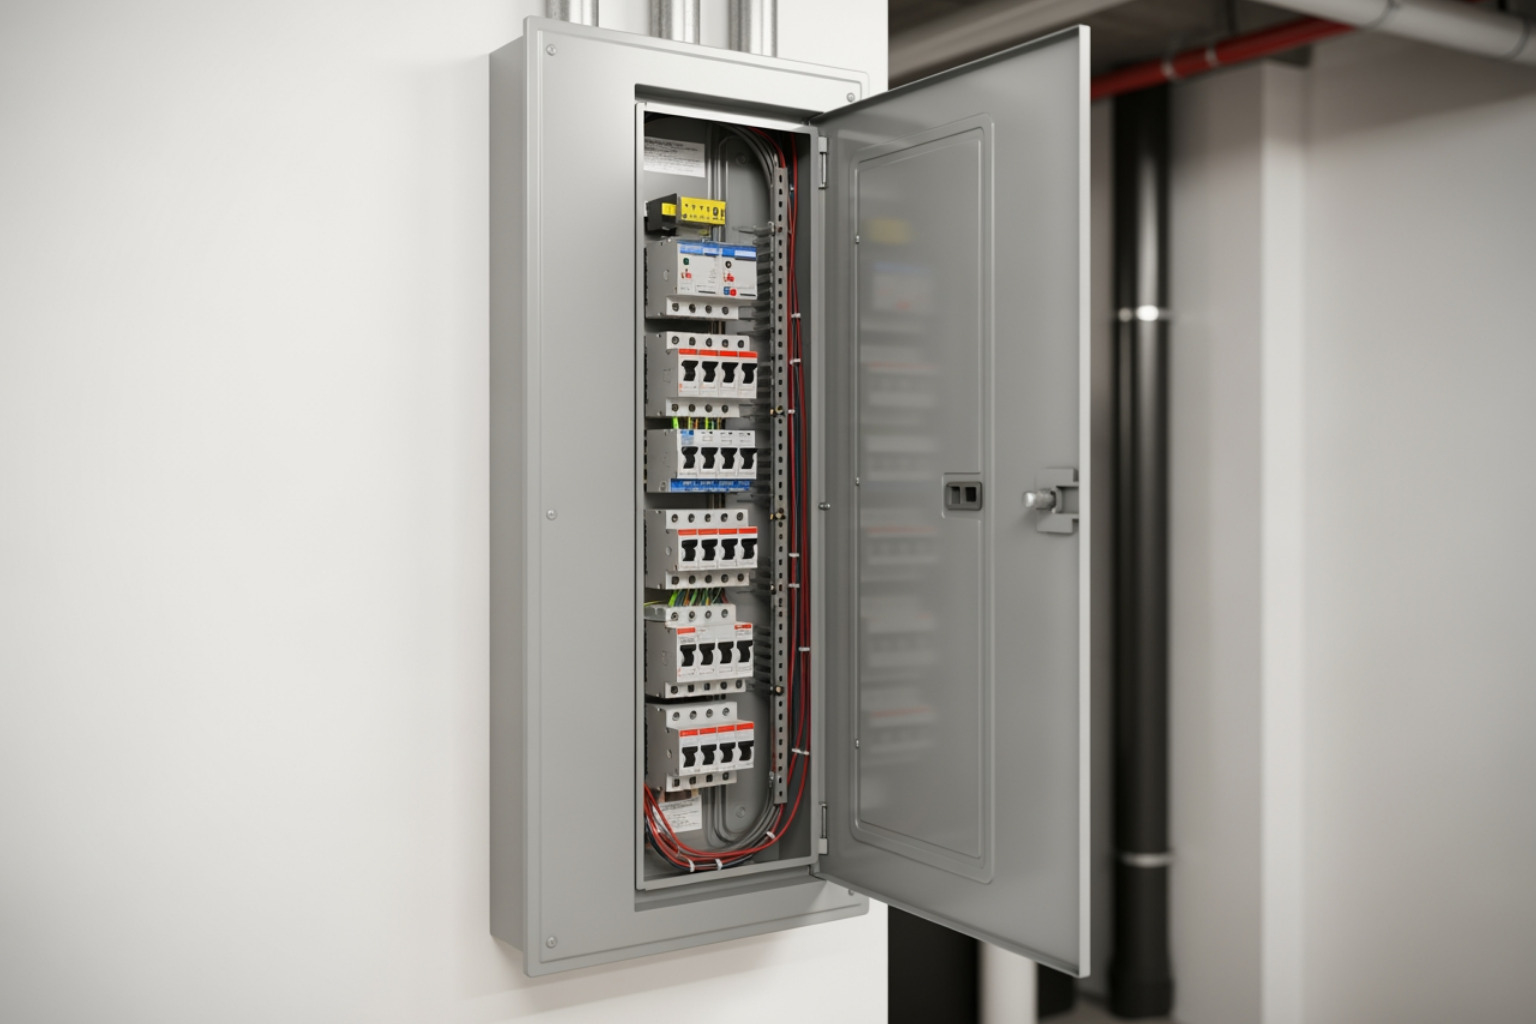
Your electrical panel is the heart of your home’s electrical system. It’s the metal box in your basement or garage that takes power from the utility company and distributes it to all your lights, outlets, and appliances.
More importantly, it’s a safety device. The circuit breakers inside are designed to trip and cut power during an overload or short circuit, preventing electrical fires. Most panels last about 20-25 years before they become outdated or wear out.
If you want a deeper, neutral explanation of how breakers protect against overloads, the U.S. Consumer Product Safety Commission has a helpful overview on Household Wiring Systems.
How to Tell If Your Panel Needs an Upgrade
Knowing when your panel needs attention is key. What I usually see in Denver homes is that older panels are struggling to keep up with modern electrical demands.
Here are some tell-tale signs it might be time for an upgrade:
- Frequent Breaker Trips: If your breakers trip constantly or lights flicker when a large appliance turns on, your panel may be overloaded.
- Burning Smells or Scorch Marks: This is a serious fire hazard. If you smell something burning or see scorch marks near your panel, call an electrician immediately.
- An Older Panel: If your panel is over 25 years old, it’s a good idea to have it inspected. Panels in homes built before 1960 often have low capacities (60-100 amps) that can’t handle modern electronics.
- Recalled Brands: We still find panels from brands like Federal Pacific Electric (FPE) and Zinsco in older homes. These have known safety defects and are considered fire hazards. If you have one, a replacement is a critical safety measure. You can learn more about specific Electrical Panel Recall: FPE, Zinsco, Aluminum issues on our blog. For a broader, independent perspective on older and unsafe equipment, the CPSC also has guidance on Electrical Safety in the Home.
- No Space for New Circuits: If you’re planning to add an EV charger, hot tub, or home addition and your panel is full, you’ll need to upgrade.
Replacement vs. Upgrade: What’s the Difference?
When we talk about panel work, you’ll hear a few different terms. Here’s a quick breakdown:
- Full Replacement: This means swapping the entire old panel for a new, modern one. This is necessary if the old panel is damaged, recalled, or too small for your home’s needs.
- Service Upgrade: This refers to increasing the amount of power (amperage) coming into your home, for example, going from 100 amps to 200 amps. This almost always includes a full panel replacement to handle the higher capacity.
- Adding a Sub-panel: If you just need more circuits for a specific area like a new garage or basement, a sub-panel can be a good solution. It draws power from the main panel but provides extra breaker slots for that area.
The right choice depends on your home’s current state and future plans. We explore these differences in more detail in our article on Electrical Panel Replacement vs. Repair.
Planning Ahead: Sizing, Permits, and Thinking About the Future
Before you touch a wire, a little planning goes a long way. This is where we lay the groundwork for a safe and effective project.
Figuring Out How Much Power You Really Need
One of the biggest questions I get is, “How big of a panel do I need?” It comes down to your current and future electrical use.
Think about your current appliances and electronics. Then, consider your future plans. Are you thinking about:
- Installing an EV charger?
- Adding a hot tub or sauna?
- Finishing a basement or building an addition?
- Switching from gas to electric appliances?
While older Denver homes might have 100-amp panels, 200-amp service is now the standard for modern living. It’s not about guessing; a professional calculates your total electrical load to ensure your new panel can handle everything safely.
Planning for What’s Next
When we install electric panel systems, we’re not just thinking about today; we’re thinking about tomorrow. Future-proofing your electrical system is a smart investment.
Consider choosing a panel with extra breaker slots for future projects like solar panels, home battery storage, or other upgrades. This makes future expansions much easier and less expensive.
Permits, Inspections, and What It All Costs
This part isn’t exciting, but it’s non-negotiable. In Denver and surrounding communities like Castle Rock and Highlands Ranch, a permit is required for any panel replacement. This ensures the work is done to code and is safe.
Only a licensed master electrician can typically pull these permits. The process involves:
- Coordinating with the utility company (like Xcel Energy) to shut off power.
- Passing a city inspection after the work is done.
- Coordinating with the utility to turn power back on.
As for cost, a professional panel replacement in the Denver area typically runs between $1,500 and $4,000. The final price depends on the panel size (a 200-amp upgrade costs more than a 100-amp replacement), the condition of your existing wiring, and whether the panel needs to be moved. While it’s a significant investment, it’s crucial for your home’s safety and ability to handle modern electrical needs.
Safety First: Tools, Gear, and Must-Follow Precautions
This is the most important part of the guide. When you’re working with your home’s main power supply, safety is everything.
Tools and Materials You’ll Need
Having all your tools and materials ready helps ensure the job goes smoothly. Here’s a list of the essentials:
- Voltage Tester: Your most important safety tool. Use it to double-check that power is off before touching any wires.
- Screwdrivers, Pliers, and Wire Strippers
- Cordless Drill
- New Electrical Panel and Circuit Breakers: Make sure they are the correct size and type. Modern codes often require AFCI and GFCI breakers in certain areas.
- Electrical Wires, Connectors, and Clamps
- Grounding Rod & Clamp

Safety Steps You Can’t Skip
I cannot stress this enough: working on an electrical panel is extremely dangerous. If you have any doubts, please stop and call a licensed electrician.
Here are the crucial safety precautions:
- Shut Off the Main Power (at the source): Don’t just flip the main breaker. You must contact your utility company (Xcel Energy in our area) to shut off power at the meter.
- Use a Voltage Tester to Confirm Power is Off: After the utility disconnects power, test the main service wires and all circuits to confirm no electricity is present. Test, then test again.
- Lockout/Tagout: Use a lockout device on the meter to physically prevent anyone from accidentally turning the power back on while you’re working.
- Wear Personal Protective Equipment (PPE): This includes insulated gloves, safety goggles, and insulated boots. Avoid loose clothing or jewelry.
- Work in a Dry Area: Never work on an electrical panel in wet or damp conditions. Stand on a rubber mat for added insulation.
Even after the utility cuts power, treat every wire as if it’s live until you’ve verified it’s dead with your voltage tester.
How a Pro Installs an Electrical Panel: Step-by-Step
Here’s how I approach a panel installation. This is a complex process that requires precision and a deep understanding of electrical systems. If you’re not 100% confident, this is a good time to call a pro.
Step 1: Removing the Old Panel
After the utility company has shut off power and we’ve confirmed it with a voltage tester, the first step is to carefully remove the old panel. We disconnect every circuit and label each wire so we know exactly where it goes in the new panel. This is the most critical part of the process to avoid confusion later. Once everything is disconnected and labeled, we unmount the old box from the wall.

Step 2: Installing the New Panel and Main Connections
With the old panel gone, we mount the new one securely, making sure it’s level and has at least three feet of clear space around it as required by code. We then install the main breaker and connect the heavy-gauge service wires from the utility meter—two “hot” wires to the main breaker and the “neutral” wire to the neutral bus bar. Finally, we connect the main grounding wire to the grounding bus bar and ensure it’s properly connected to a grounding rod outside.
Step 3: Wiring the Branch Circuits
Now we connect the individual circuits that power your home. We pull the labeled wires into the new panel, leaving enough slack to work. All the bare copper ground wires go to the ground bus bar, and all the white neutral wires go to the neutral bus bar. We then install the new breakers and connect the hot wires (usually black or red) for each circuit, making sure every connection is tight and secure.
Step 4: Organizing, Labeling, and Double-Checking
A well-installed panel is neat and organized. We arrange the wires for good airflow and easy future access. We then create a clear, accurate panel legend that maps out what each breaker controls—no more guessing games. Before closing up, we double-check every single connection. Finally, we install the inner cover (the “dead front”) to prevent accidental contact with live parts and close the main door.
Real-World Advice: Common Mistakes and When to Call for Help
I’ve fixed a lot of DIY electrical work over the years. While the steps might seem straightforward, the reality of working with complex wiring can be very different.
Mistakes I See Most Often
Even experienced DIYers can make mistakes when they install electric panel systems. These errors aren’t just minor issues; they can be serious safety hazards.
Here are the most common and dangerous mistakes I see in homes around Denver:
- Loose Connections: Wires that aren’t securely fastened can arc, generate heat, and cause electrical fires. This is the #1 issue.
- Using the Wrong Size Breakers: A breaker that’s too large for the wire it’s protecting won’t trip when it should, leading to overheated wires and a fire risk.
- Improper Grounding: Mixing up neutral and ground wires can defeat the panel’s most important safety features and create shock hazards.
- Skipping the Permit and Inspection: This is a legal and safety requirement. Skipping it means your work is unverified and can cause major problems with insurance or when you sell your home.
If you’d like a neutral checklist on what safe residential wiring should look like, the National Fire Protection Association offers a homeowner guide on Electrical Safety in the Home that lines up well with what I see in the field.
When It’s Time to Call a Trusted Electrician
If you’re ever unsure or uncomfortable during an electrical project, that’s your cue to stop and call a professional. Your safety is paramount.
Here are specific times when calling a licensed electrician is necessary:
- If You’re Ever Unsure: This is the golden rule. Electrical work is not the place for guesswork. If a step seems too complex, call us.
- If You Have an Old or Recalled Panel: Certain older panels (like Federal Pacific or Zinsco) are known fire hazards and need immediate professional replacement. The same goes for outdated aluminum wiring, which requires expert handling.
- If You Need a Service Upgrade: Increasing the amperage to your home (e.g., from 100 to 200 amps) always requires a licensed professional to coordinate with the utility company.
- If You Want the Job Done Right: A licensed electrician ensures the work is safe, up to code, and often comes with a warranty. At Harmony Electric, we back select installations with a lifetime workmanship guarantee for your peace of mind.
If you want to double-check someone’s credentials, you can search for licensed electricians through the Colorado Department of Regulatory Agencies.
For complex installations, reaching out to a trusted electrician is always the smartest choice. We’re here to help homeowners in Castle Rock, Denver, and surrounding communities with all their electrical panel needs, including Electrical Panel Upgrades in Castle Rock, CO.
Wrapping Up: Inspection, Power-Up, and What Comes Next
The physical installation is a huge step, but the job isn’t done until the power is safely back on and everything is tested.
Final Inspection and Turning the Power Back On
- Schedule the City Inspection: Once the panel is installed, it must be inspected by the city to verify it meets all code requirements.
- Coordinate with the Utility Company: After the inspection passes, we coordinate with Xcel Energy to have them reconnect your home’s main electrical service.
- Power Up and Test: Once power is restored, we turn on the main breaker, then energize each circuit one by one. We then go through the house to test every light, outlet, and appliance to ensure everything is working correctly and safely.
What to Do Next for a Safe, Reliable Electrical System
Installing an electrical panel is a big, complex job. If you’ve read this guide and decided that calling a pro is the right move, you’re making a smart choice for your safety and your home. Most homeowners and even experienced DIYers choose professional help for this critical work.
If you’re in Denver, Castle Rock, Castle Pines, Centennial, Highlands Ranch, Parker, Lone Tree, or our surrounding communities, Harmony Electric is here to help. We specialize in electrical panel upgrades, EV charger installation, and other whole-home electrical solutions. We pride ourselves on clean, high-quality work without unnecessary complexity.
For a safe, code-compliant installation that protects your home, reach out to us for help. You can learn more by visiting our page on Electrical Panel Upgrades in Castle Rock, CO.
Note: If you’re ever in doubt, it’s always safer to call a licensed electrician. Your safety—and your home—are worth it.