Why Basement Remodeling Electrical Planning Can Make or Break Your Finish
Basement remodeling electrical work is one of the most critical — and most commonly underestimated — parts of finishing your basement. Get it right, and you’ll have a safe, functional living space that adds real value to your home. Get it wrong, and you’re looking at hidden fire hazards, failed inspections, and expensive rework after the drywall is already up.
Here’s a quick overview of what basement electrical remodeling involves:
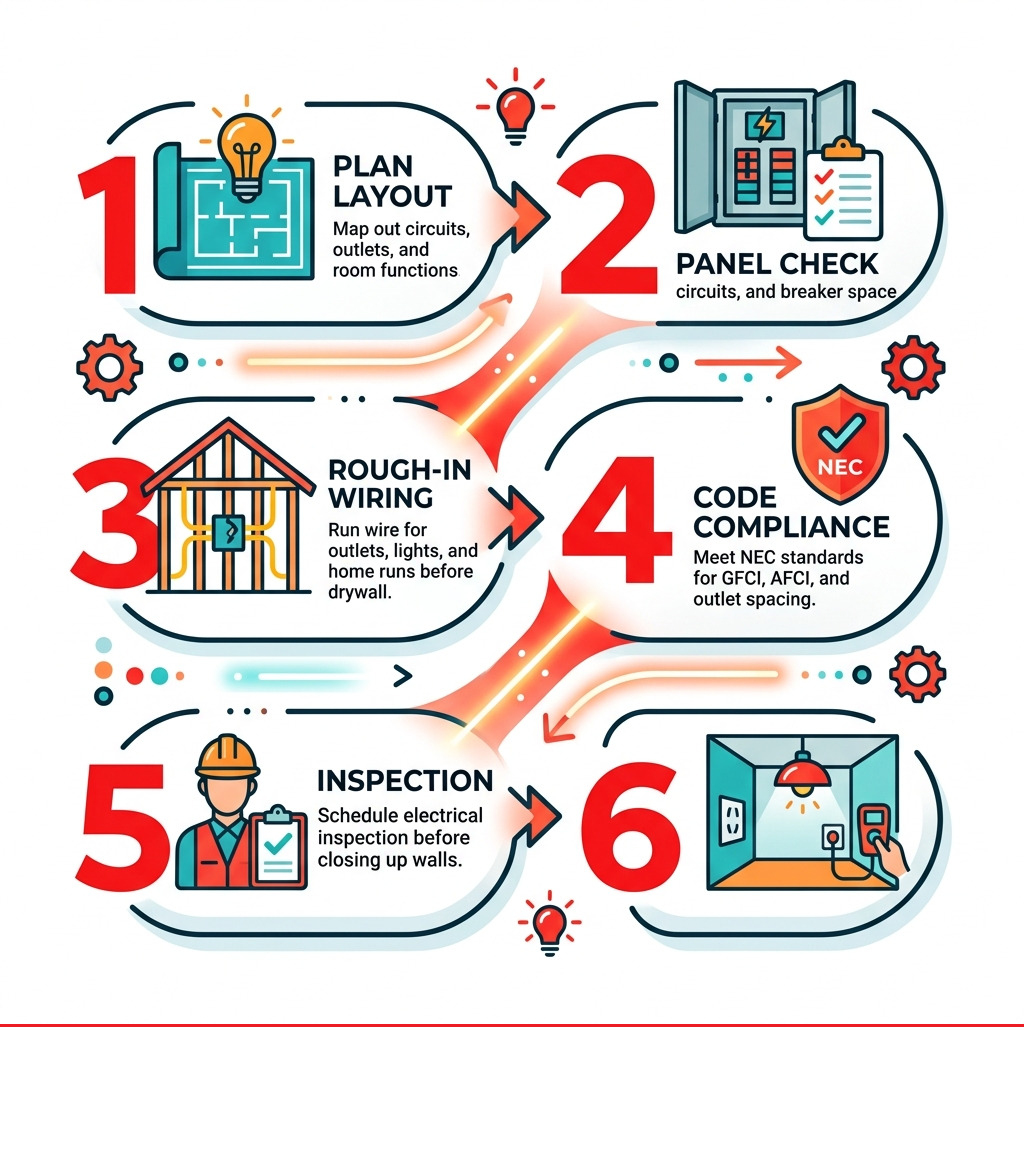
| Step | What It Covers |
|---|---|
| 1. Plan your layout | Map circuits, home runs, and room functions before framing |
| 2. Assess your panel | Check capacity, available slots, and whether a subpanel is needed |
| 3. Rough-in wiring | Run wire for outlets, lights, and dedicated circuits before drywall |
| 4. Meet code requirements | GFCI, AFCI, outlet spacing, and smoke detectors |
| 5. Get inspected | Rough-in inspection before drywall, final sign-off at completion |
| 6. Finish and test | Install devices, fixtures, and verify everything works safely |
I’m Randy Harmuth, Master Electrician and owner of Harmony Electric here in Denver. Over the years, I’ve walked through hundreds of unfinished basements with homeowners who are excited to get started — and most of them are surprised by how much electrical planning goes into it before a single outlet gets installed.
The truth is, a basement is a unique environment. It’s below grade, often moisture-prone, and usually starts with almost no electrical infrastructure. You’re essentially building a new living space from scratch — and the electrical system is the backbone of all of it.
What I usually see in Denver homes is that people either underplan (not enough circuits, outlets too far apart) or they start framing before they’ve thought through where the lights and plugs need to go. Both mistakes cost money to fix later.
This guide walks you through everything — from planning your circuit layout and choosing the right wire gauge, to meeting code requirements and knowing when to call in a licensed electrician.
Planning Your Basement Remodeling Electrical Layout
When you start a basement project, the “rough-in” phase is where the magic happens. This is the period after framing is complete but before the drywall goes up. It is the absolute best time to handle your Basement Remodeling Electrical needs because every stud bay is open and accessible.
One of the first things we do is plan the “home runs.” In electrical terms, a home run is a wire that goes directly from the main electrical panel to the first device in a circuit without stopping anywhere else. In a typical basement finish, you might have six or more home runs depending on the size of the space.
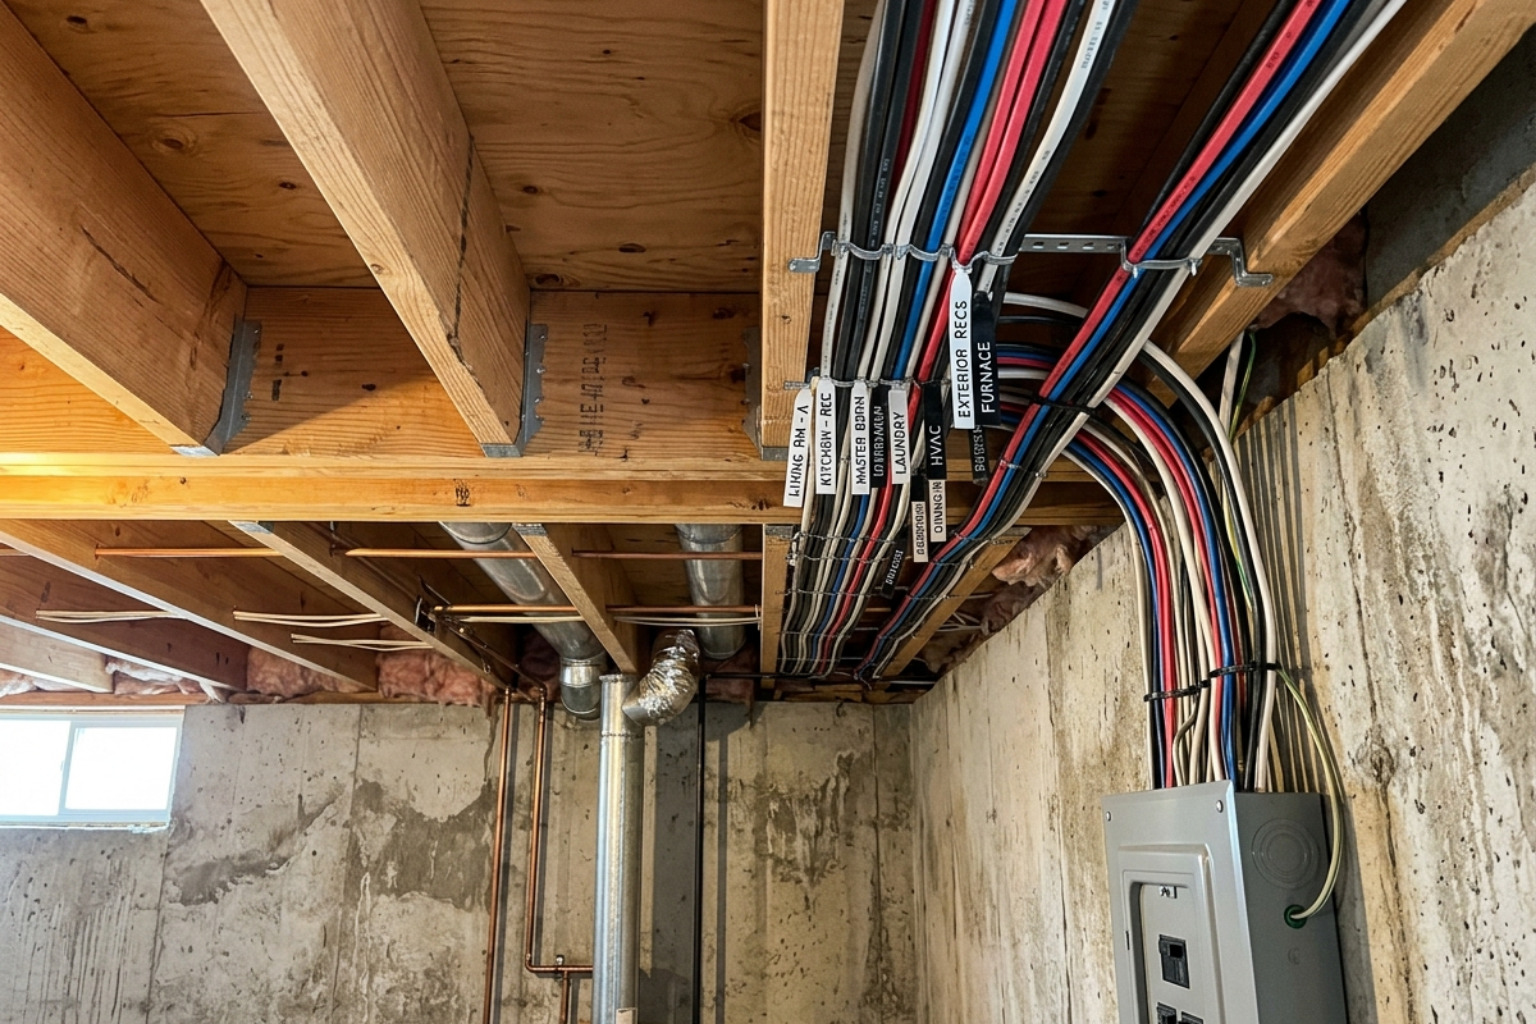
Early planning allows us to map out where you need constant power versus switched power. A common “AHA!” moment for many homeowners is realizing that you can’t just pull power from the nearest light fixture to add a new outlet. If you do, that outlet will only work when the light is turned on! We always start our runs at the outlets (constant power) before moving to the switches and lights.
Understanding Load and the Basement Remodeling Electrical Panel
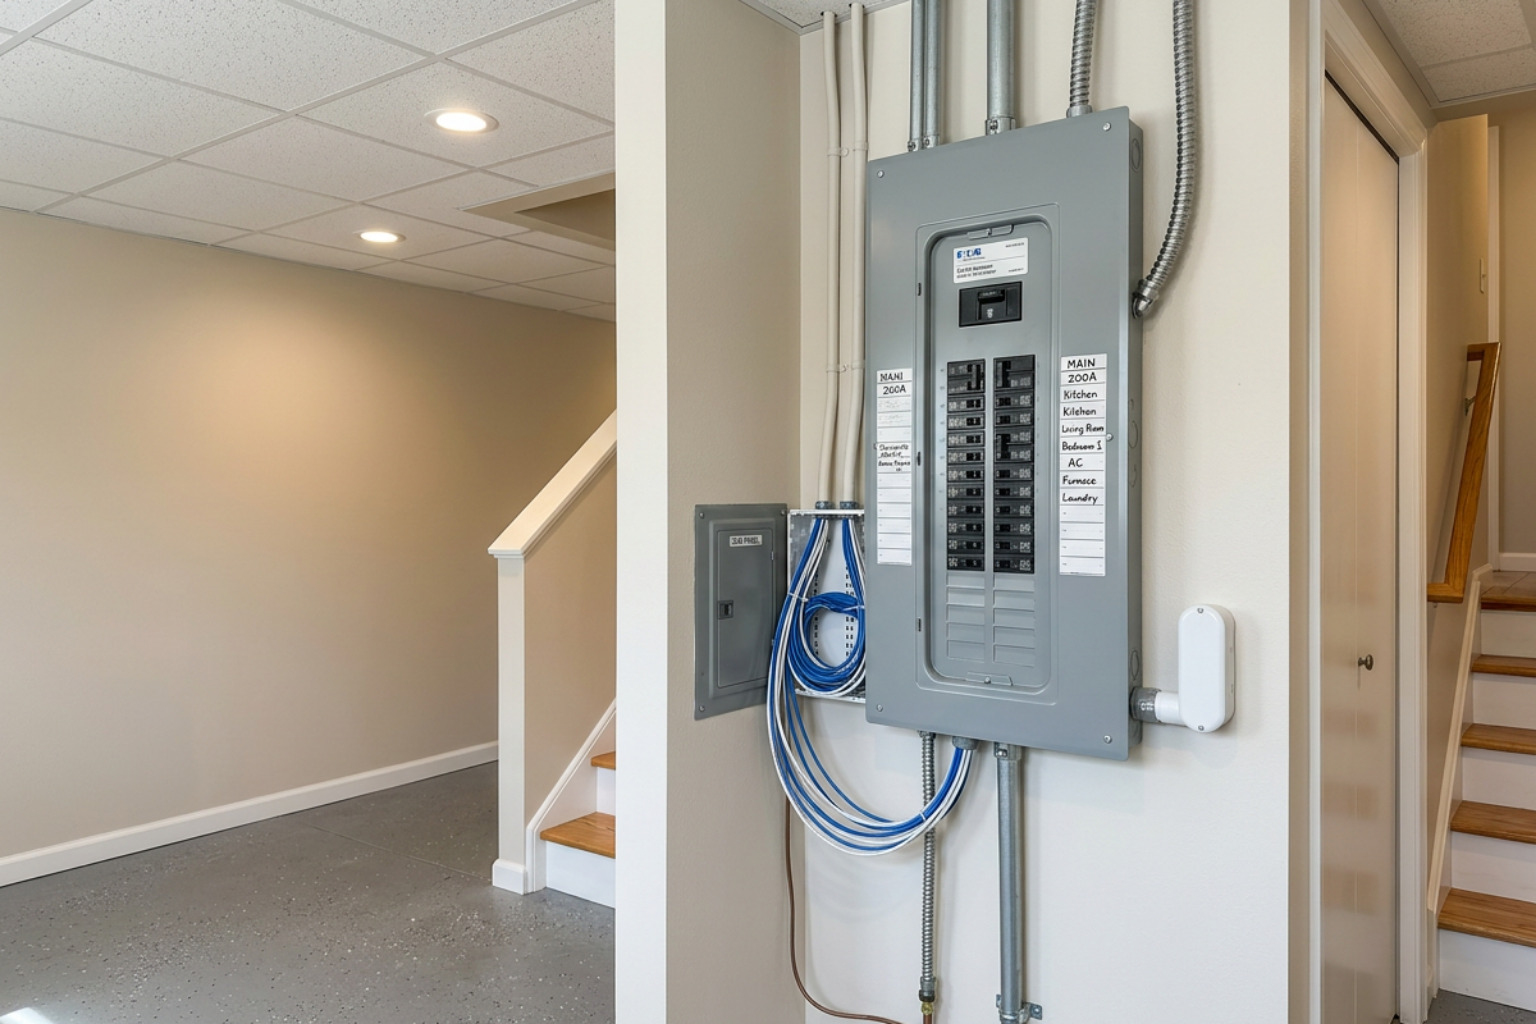
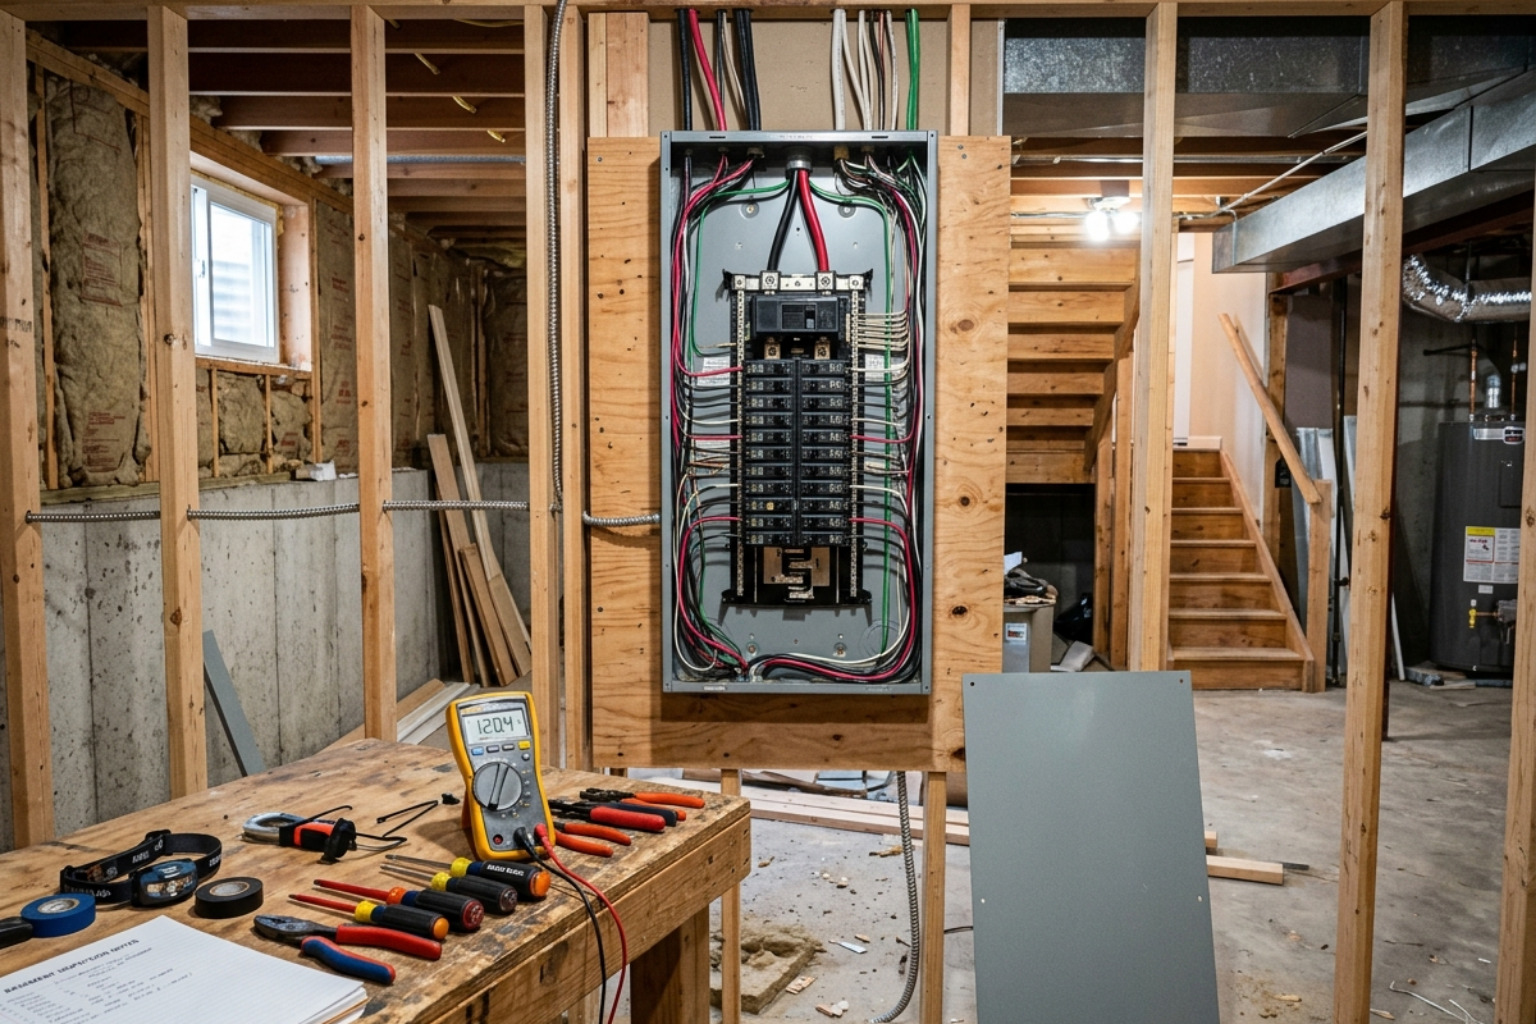
Before we pull a single foot of wire, we have to look at your main electrical panel. Most modern homes in the Denver Metro Area, from Highlands Ranch to Centennial, have 150-amp or 200-amp panels. However, in some of our older neighborhoods, we still see 100-amp panels that are already working hard just to keep the kitchen and AC running.
Adding a bedroom, a bathroom, and a home theater in the basement adds a significant “load” to your system. We perform a load calculation to see if your current panel can handle the extra demand. If your panel is full (no empty slots for new breakers) or underpowered, we have a decision to make: an upgrade or a subpanel.
| Feature | Main Panel Only | Adding a Subpanel |
|---|---|---|
| Cost | Lower (if slots are available) | Moderate |
| Convenience | All breakers in one spot | Control basement power locally |
| Capacity | Limited by existing bus bar | Expands available breaker space |
| Best For | Small finishes (one room) | Full basement remodels/Apartments |
If your main panel is located in the garage and we’re finishing a basement in Castle Rock, running ten different home runs all the way across the house can be a nightmare. In those cases, we often recommend a dedicated subpanel in the basement. It makes the wiring runs shorter and cleaner, and it gives you a local spot to reset a breaker if someone plugs in a space heater and a vacuum at the same time.
Smart Features for a Modern Basement Remodeling Electrical Plan
Since you’re already opening up the walls, this is the time to think about “future-proofing.” A modern basement is more than just four walls and a carpet; it’s an entertainment hub and often a home office.
- USB-C Outlets: We like to install these right next to where the nightstands will be in a basement bedroom or near the bar area. No more hunting for “bricks.”
- Dimmers: Basements can feel “cave-like.” Using dimmers with LED lighting allows you to shift from bright “work mode” to a cozy “movie night” vibe instantly.
- Ethernet (Cat6): While Wi-Fi is great, nothing beats a hardwired connection for gaming consoles or a home office setup. We recommend running Cat6 cable to any spot where a TV or desk will live.
- Smart Switches: Integrating with systems like Alexa or Google Home is much easier when the neutral wires are properly tucked into the boxes during the rough-in.
If you’re feeling overwhelmed by the options, checking out our Harmony Electric basement finish out services can give you a better idea of how we handle these modern integrations for our neighbors in Parker and Lone Tree.
Meeting Code: Outlets, Spacing, and Safety Features
Electrical codes aren’t just red tape; they are written in blood to prevent fires and shocks. In Colorado, we follow the National Electrical Code (NEC), and local jurisdictions like Denver or Castle Pines may have specific tweaks.
The most famous rule is the “12-foot rule.” Basically, you should be able to walk along any continuous wall and never be more than six feet away from an outlet. This means outlets are typically spaced every 12 feet. Why? Because the average lamp cord is six feet long, and the code wants to prevent people from running dangerous extension cords across doorways.
We also pay close attention to height. Standard outlets usually sit 12 to 18 inches off the floor. However, in a basement, we also have to consider “moisture zones.” If you have a utility room with a sump pump or a wet bar, the rules change.
Mandatory Safety with AFCI and GFCI Protection
There are two types of “safety” breakers we use in Basement Remodeling Electrical work, and they do very different things:
- GFCI (Ground Fault Circuit Interrupter): These protect people. They trip if they detect electricity “leaking” where it shouldn’t—like through a person into a puddle of water. These are mandatory near sinks, in bathrooms, and in any unfinished storage or utility areas.
- AFCI (Arc Fault Circuit Interrupter): These protect property. They trip if they detect a “spark” or “arc” inside the wall—the kind caused by a nail accidentally driven through a wire or a loose connection. Modern code requires AFCI protection for almost every circuit in a finished basement, especially bedrooms and living areas.
In 2026, the standards for these are stricter than ever. What I usually see in Denver homes is that older basements lack these protections. When we remodel, we bring everything up to current safety standards to ensure your family is protected from both shock and fire.
Choosing the Right Wire Gauge and Dedicated Circuits
Not all wire is created equal. In residential work, we mostly use “Romex,” which is a brand name for non-metallic sheathed cable. The two most common sizes are #14 gauge and #12 gauge.
- #14 Gauge (15-Amp): This is thinner wire. We typically use this for lighting circuits. It’s easier to work with but can’t handle heavy loads.
- #12 Gauge (20-Amp): This is thicker. Most inspectors and pros (including us at Harmony Electric) prefer #12 gauge for all the wall plugs.
Think of it like a water pipe: a bigger pipe can move more water without bursting. A #12 wire can handle a vacuum cleaner, a space heater, or a high-end gaming PC without getting hot or tripping the breaker. One major “no-no” in the electrical world is mixing gauges on the same circuit. You can’t start with #12 and switch to #14 halfway through. It’s a code violation and a safety risk.
When You Need Dedicated Basement Remodeling Electrical Runs
A “dedicated circuit” is a wire that serves only one appliance. This is crucial for high-draw items that would otherwise trip a shared breaker. In a basement, you almost always need dedicated runs for:
- Home Theaters: High-end subwoofers and amplifiers pull a lot of juice.
- Microwaves: If you’re adding a kitchenette or wet bar, the microwave needs its own 20-amp line.
- Sump Pumps: You do not want your sump pump on a circuit that might trip because someone plugged in a hair dryer.
- Bathroom Heat Lamps: These pull a massive amount of heat and electricity.
- Gym Equipment: Treadmills are notorious for causing “noise” on a circuit and tripping AFCI breakers if they aren’t on a dedicated line.
Lighting Design for Low-Light Spaces
Basements have a reputation for being dark and dingy, but that’s usually just a lighting problem. Since natural light is limited (unless you have large egress windows), we use “layered lighting.”
The “king” of Basement Remodeling Electrical lighting right now is the LED recessed wafer light. These are incredibly thin—about half an inch—meaning they can fit almost anywhere, even if there’s a plumbing pipe or a duct right above the drywall.
We recommend:
- Ambient Light: Recessed wafers spaced about 5 to 6 feet apart for general brightness.
- Task Lighting: Pendant lights over a bar or bright LED strips under cabinets in a kitchenette.
- Accent Lighting: Wall sconces to add warmth and break up the “long hallway” feel many basements have.
Safety is also a factor. We always install 3-way switches at the top and bottom of the stairs so you never have to walk down into a dark basement to find the light switch.
Frequently Asked Questions about Basement Electrical
Do I need a permit for my basement electrical work?
Yes, absolutely. Whether you’re in Centennial or Castle Rock, if you are adding new circuits or moving wires, a permit is required. This ensures that a city inspector comes out to check the work. Having a permit is vital for your home’s resale value and ensures your insurance company will cover you in the event of a claim.
Can I DIY the electrical rough-in myself?
You can, but it’s the one area of home remodeling where a mistake can be fatal or burn the house down. According to the Electrical Safety Foundation International, thousands of home fires are caused by electrical malfunctions every year. “YouTube-licensed” electricians often miss the nuances of grounding, box fill, and proper stapling. We often get calls to “fix” DIY work that failed inspection, which usually ends up costing the homeowner more than if they had hired us from the start.
How much does basement electrical rough-in typically cost?
It varies. A simple one-room finish might be a few thousand dollars, while a large basement with a kitchen, home theater, and bathroom will be more. Factors include the number of fixtures, the need for a panel upgrade, and the current price of copper. In the Denver market, we always recommend a 10-15% contingency fund for your budget to handle any surprises behind the walls.
Conclusion
Finishing your basement is an investment in your home and your lifestyle. At Harmony Electric, we believe that the best electrical work is the kind you never have to think about because it just works—safely and reliably.
As a Master Electrician, my goal is to provide honest recommendations and clear communication. Whether you’re in Highlands Ranch, Parker, or right here in Denver, we take pride in doing the work right the first time. We back our select installations with a lifetime workmanship guarantee because we stand behind every wire we pull.
If you’re ready to turn that dark, unfinished space into your favorite room in the house, start your project with a Harmony Electric basement finish out. We’ll help you plan a system that meets your needs today and is ready for whatever technology comes next. Don’t get zapped—let the pros handle the heavy lifting!